Here is a link to the list of all of the gear I use for real estate shoots: https://kit.com/parkerwalbeck/real-estate-video-beginners-kit
Parker Walbeck here with Fulltimefilmmaker.com, after receiving hundreds of questions as to what makes a great real estate video, I decided to put together a list of my TOP 10 Tips for shooting professional real estate videos. And If you end up liking these tips, I’ve actually put together a 4 hour mini course focusing on landing, filming, and editing real estate videos, so stay tuned til the end to learn more about that! But let’s go ahead and dive right in!
Tip #1
How do I Land Real Estate Gigs? Who to approach? What to say?
(This is probably my most commonly asked question when it comes to real estate videos)
The most important factor I’ve found to land real estate clients is to Have a strong demo video or portfolio. You can be the smoothest talker in the world, but if your work sucks… no one will hire you. Your work should do most of the talking for you. If you don’t have a demo video then I’d go out offering my services for free to real estate agents until someone agrees to let you shoot a free video, that you can then use as a demo video to land future clients. Be aware though, real estate agents won’t be willing to pay decent money for a real estate video unless they have a lot of commission on the line. That’s why I recommend only targeting LUXURY LISTINGS! Because agents of luxury listing will usually have marketing budgets for videos. And by Luxury I mean multi million dollar listings. The smallest listing I’ve done a video for was about 1 million dollars, and I’ve done up to 11 million dollar listings. So I would try and target homes in that range if I were you.
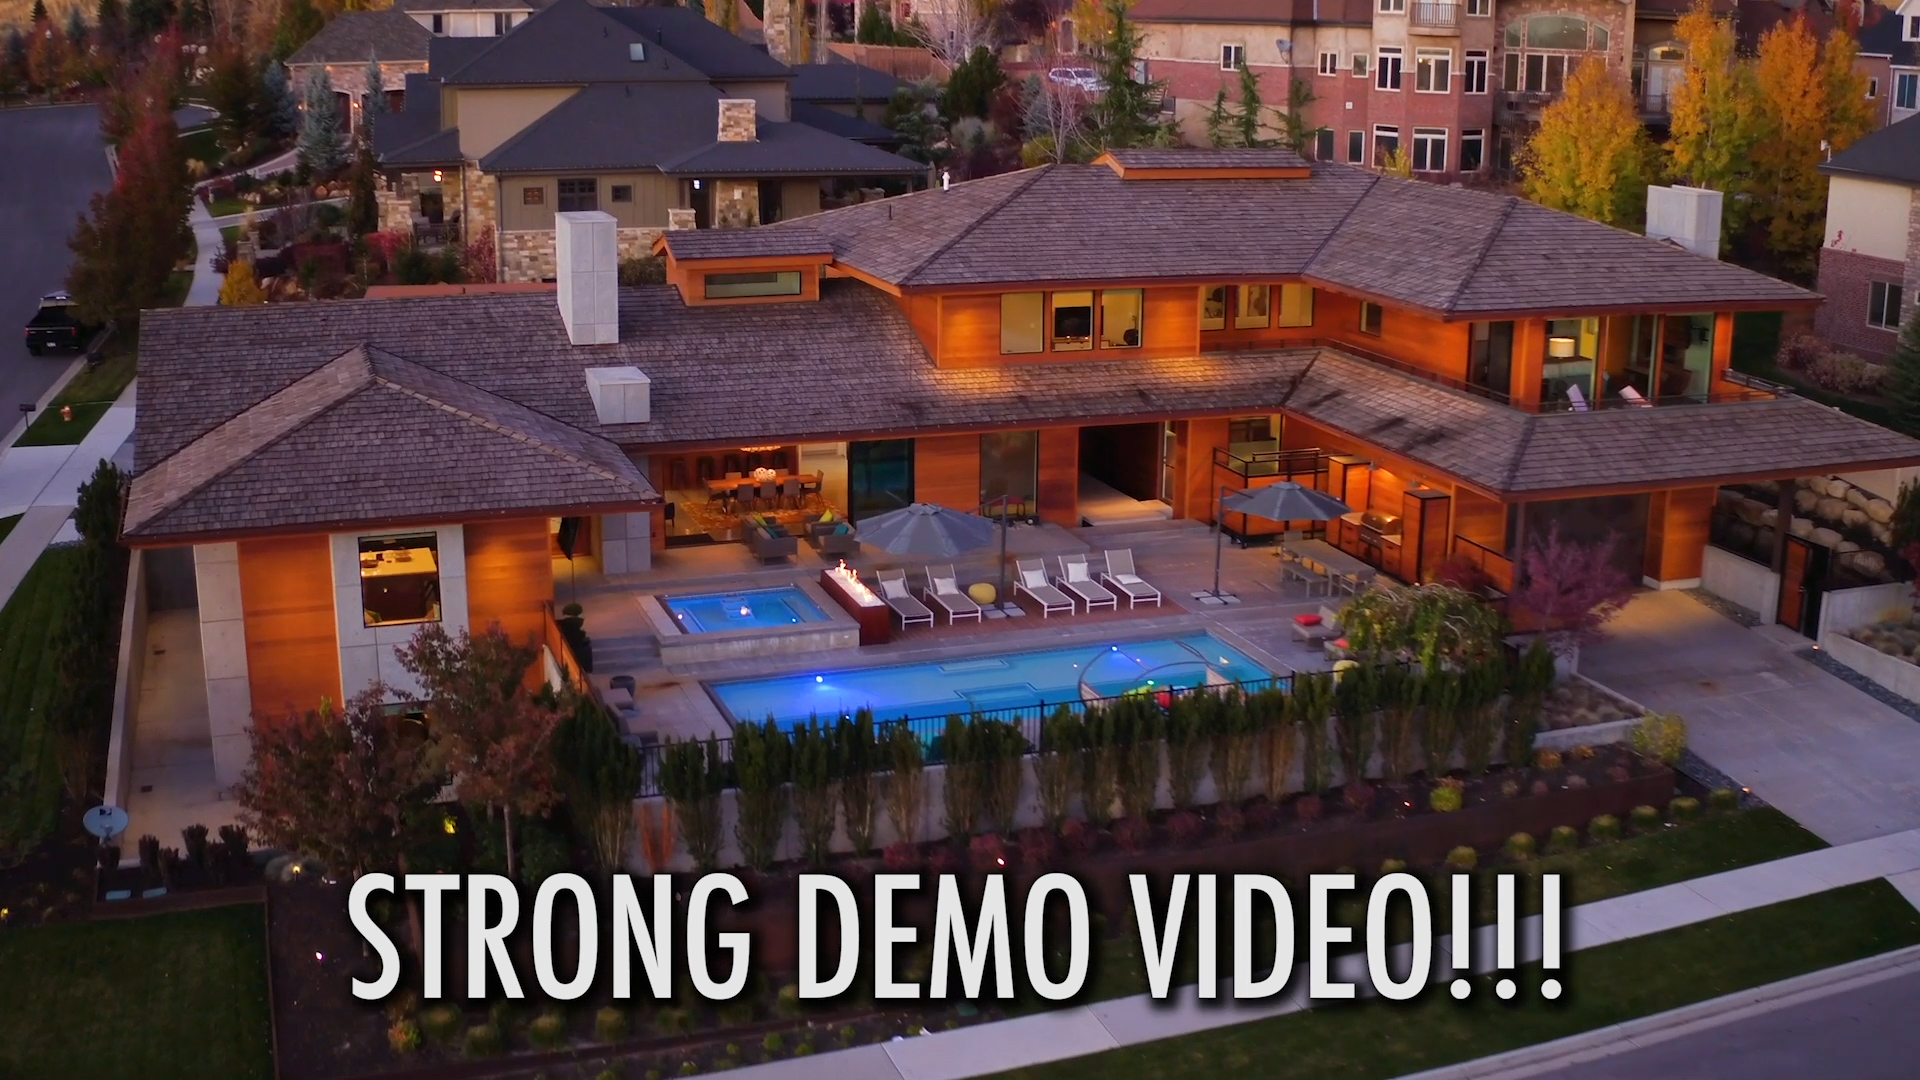
As far as the logistics of getting in contact with a real estate agent, go drive through luxury neighborhoods looking for for sale signs, and call the number of the agent on the sign.Or, Go online and look for luxury listings near you, and contact the agent.Really not that hard to make contact. What should you say when contacting them? Well, tell them you want to shoot real estate videos for them, then send them a demo video of your work, and I recommend Telling them what you normally charge but that you’ll do the first one for free or cheap to show them the value it will bring to their business..I like to Focus on building relationships rather than making a quick buck so that they will hire me long term to do many more properties.
Now I asked my real estate agent specifically, what do you look for when a videographer reaches out to you about shooting video for you, besides obviously the quality of their work, and he said The two big things that are important to him are: BEING AVAILABLE! And Having a quick turn around time. Agents never know when they’ll need a video done, but when they do, they need it quick, so you have to be willing to be flexibly with your time and squeeze them in your schedule even if you have a busy week.
And Once the video is shot, they need that video turned around quick!I usually send the first cut back to the client within a day or 2, so they can give me any feedback and we can finish the project within a week or 2.So let’s assume you’ve done a free video, the agent loved it and now they want to start hiring you to do more work….
Tip #2
How Much Should I Charge?
Now this depends on how long it will take to shoot the house, and what your time is worth based on your skill level. But just to give you an idea, most real estate videos take me about 4-5 hours to shoot, so I charge my half day rate which is around $1,000. Then it takes another 4-5 hours to edit the video for which I charge $500. Then add on the music license and a voice over and I’m usually around $1,800-$2000 for a basic real estate video. If it’s a larger home that takes a full day, I’d charge my full day rate, if they want on camera actors, we add those costs on as well. And We’ve actually created a budget calculator that comes with Full Time Filmmaker that helps you determine your skill level, so you can know how much your time is worth, and then times that by how long the video will take to determine what price you should charge. So hopefully that gives you a good idea.
Tip #3
What preplanning needs to be done?
As soon as the agent contacts me about wanting me to shoot a house, we coordinate a date that works for us and the seller, then I have him send me pictures of what the home looks like and which way it’s facing to determine what time of day the lighting will look best, and also how big the home is so I know how long it will take to shoot. That’s about all the info I need going into a shoot: the location, the day, what time to start, and how long it will take to shoot. Then once I show up, I have the agent walk me through the house letting me know what things to feature in the video and what things to avoid, and any other nearby amenities that he wants to showcase. Then he or his assistant will go through the house, make sure all the lights are turned on and that the rooms look clean and presentable. Sometimes I’ll move things that look out of place or don’t look good on camera, but 90% of the time the agent or the seller has staged the house the way they like it, so there shouldn’t be too much prep work.
Tip #4
What is the Minimum Camera Gear needed to Shoot Professionally?
The cheapest possible set up that I’d say you can get away with and still create professional looking images is: A Canon SL2, Tokina 11-16mm, Flycam RedKing and a DJI Mavic Air. Totaling at about a $2,000 start up cost. Which seems like a lot but you should be able to make that money back with just 1 or 2 real estate gigs. I wouldn’t recommend ever showing up to a professional shoot with a GoPro or a smartphone. We don’t want clients being cheap with their budgets, so we can’t be too cheap with our gear either, it’s bad business.
But here’s a video shot by one of our Full Time Filmmaker members Josiah Begley using the Canon SL2 and a Zhiyun Crane v2 stabilizer and a Mavic Air. This was his first ever real estate video too so that just goes to show you how quickly you can create quality images without breaking the bank.
Now the reason I recommend Canon cameras is because they have great natural looking in camera colors so you won’t have to spend much time coloring in post, and I recommend using wide angle lenses so you make the home look bigger than it really is. I would say between 14mm and 18mm on a full frame sensor is a good range to be in, much wider and it looks too distorted, much tighter and you can’t see enough of the room. And I recommend using a 2.8 aperture lens because you’ll often have low light rooms when shooting real estate like in basements and to avoid having too much noise in your image you’ll want a lens that can stop down to 2.8. And yes, a drone is necessary for real estate. Maybe not for the smaller homes that don’t pay well, but for well paying luxury real estate gigs, agents are going to expect aerial footage. And in order to fly drones commercially legally, make sure to get your Part 107.
As far as the camera gear that I use, I shoot my real estate videos with a 1DX Mark 2, a Laowa 12mm lens, which when shooting at 4k on the 1dx, crops to 1.35x making it around 16mm, a Ronin S or Glidecam, personally like motorized gimbals better for real estate, and a Phantom 4 Pro Plus Drone. But like I’ve mentioned, if you’re just starting out, you can definitely get by with a cheaper set up if you know how to use your gear to its potential.
Tip #5
Best Camera Settings?
Even though I deliver the final videos in 1080p and most real estate agents aren’t going to need anything better than 1080, I shoot all of the videos in 4k. It just allows me to digital zoom in post to reframe if needed and 4k scaled down to 1080 is going to look sharper than video shot at 1080, but you can definitely get by with just shooting 1080p.
For the Frame rate I like to shoot at 60 frames per second because it helps smooth out my camera movements. The only times I use 24fps is if it’s SUPER low light or the lighting gives you banding in which case I’ll shoot at 24 so I can bring my shutter down to 1/50, but I’ve found both of those situations to be rare.
In rare cases I’ll shoot 60fps AND bring my shutter down to 1/60, but you have to make sure your movements are super slow or else you’ll see too much motion blur. But normally I keep my shutter speed double my frame rate at 1/125, my ISO I keep as low as possible, and just adjust my Aperture according to how much light is available, but typically I find myself shooting around a 2.8 to about 5.6.
For my picture profile I like using a profile that gives me great and natural colors straight out of camera and with any Canon camera you can get the look I do by creating a custom profile set to Standard with sharpness at 0, contract -2, saturation, 0, and color tone 0. For white balance this just depends on each room. But for rooms that don’t have any natural light it’s usually around 3000 kelvin, for rooms or outdoors that is lit by all natural light, It’s around 5600k, and for rooms that have a little of both, it’s usually somewhere in the middle. Just make sure to manually set your color temperature for each new room you go into and check on your camera to make sure your whites look white instead of too cool or too warm.
Tip #6
Composition
My biggest piece of advice in composing your shots is to use Wide angle lenses, that show the whole room, and make sure you’re framed up to show a dominant subject. Make it easy for the viewer to know what they are supposed to be looking at. Sometimes I see shots of multiple rooms, or not framed up in the center of the room OR I see detail shots of insignificant features. Ask the agent if there are any specific details within rooms that they want detail shots of, otherwise, I would just focus on the whole room as a whole. Another important tip to good composition is to make sure your lines are Straight lines – This will help you avoid making the rooms look distorted with your wide angle lens. You don’t want to be pointing down or up, but rather keep your camera level, so that all your lines stay straight.The only times I do tilt downs or tilt ups is if I’m trying to show the expansiveness of the ceiling height in tall rooms, or views from upper floors.
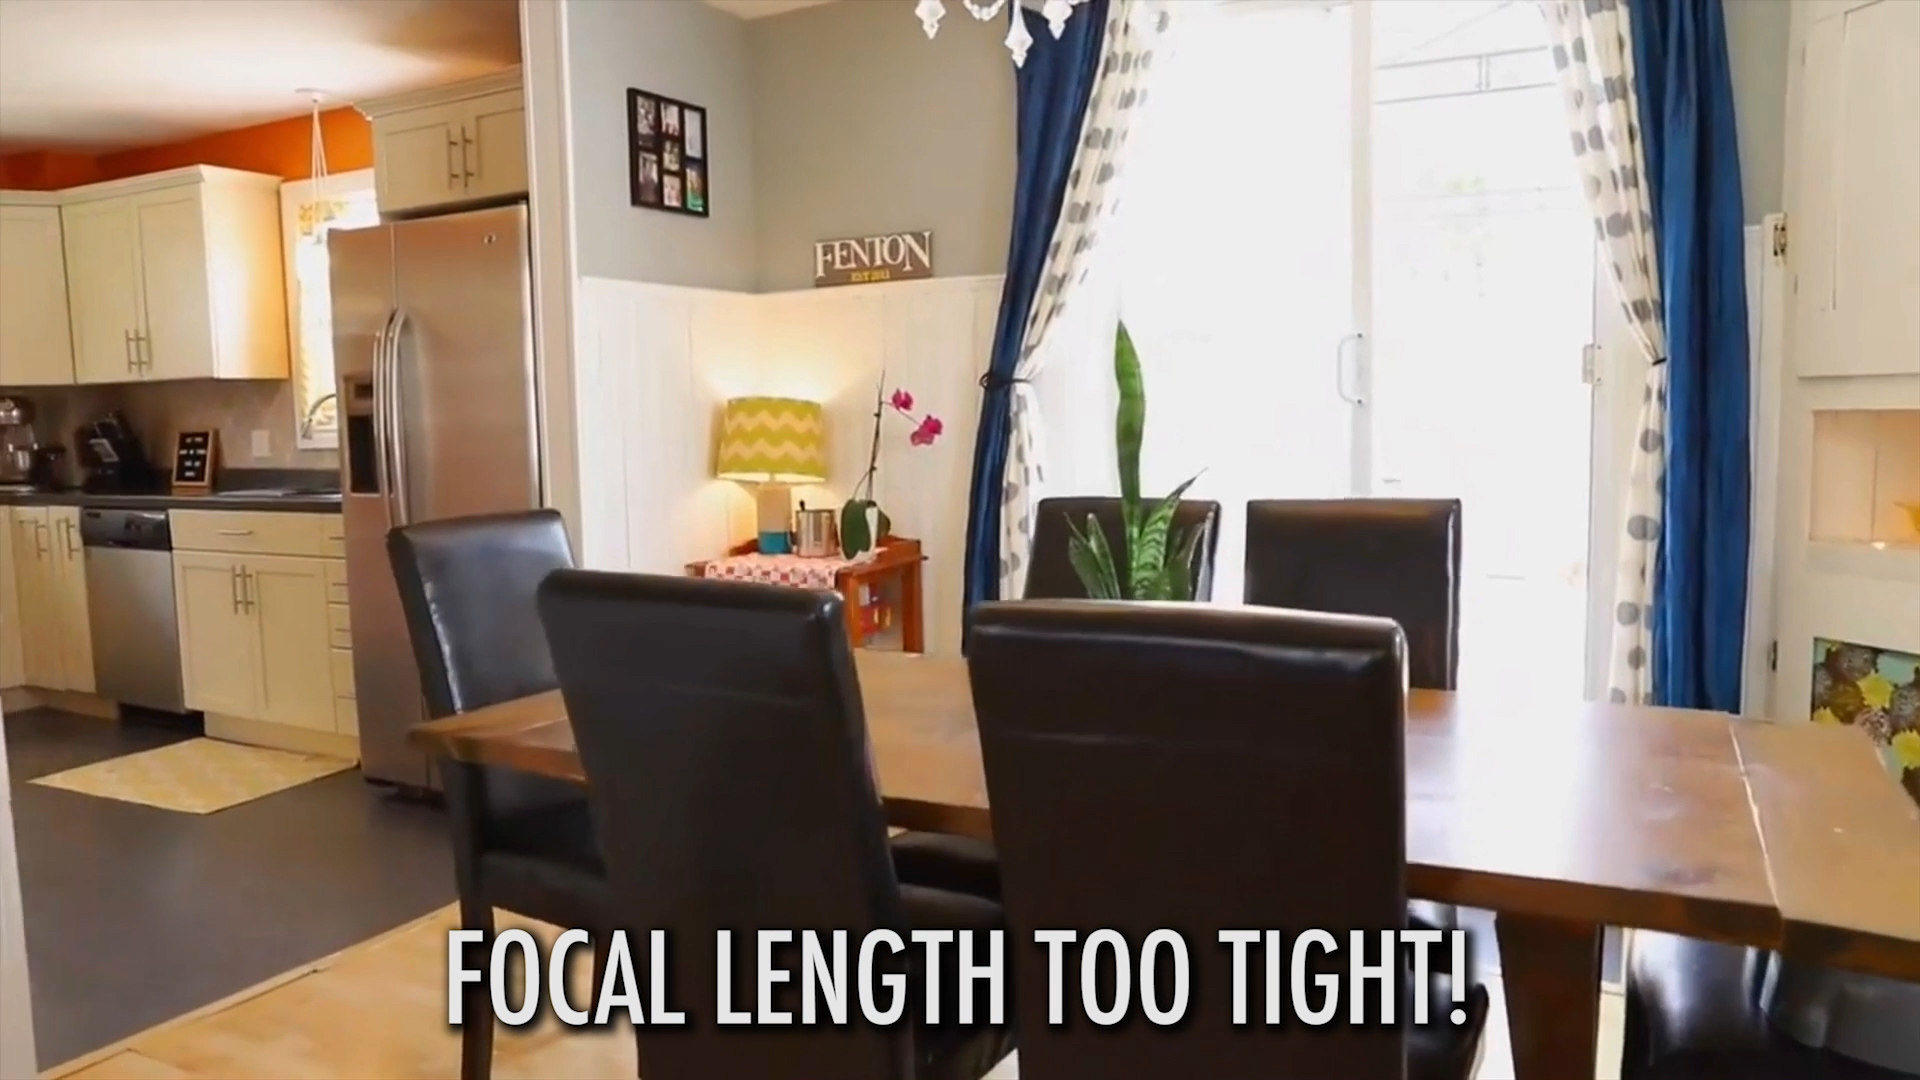
Another tip is to film at Eye to Waste Level. If you film from too high, you’ll make the ceiling look low, and if you film from too low, you won’t be able to see over furniture. So keep it natural as if you’re a person walking through the house, showing them what they would see. Another tip is to use Foreground – I like to Walk through doorways because it Gives you foreground to sell movement AND makes the room look bigger because you are shooting from outside of the room.
As it relates to Aerial shots, try not to include neighbors houses when possible, as it will make the property feel smaller. You really don’t be too far away from the house unless you’re showing off a great view or something near the house that the realtor wants to show off like a lake or mountain or something.But in general, you want to film your whole frame with the house.
Tip #7
“How Do I set My Focus For Real Estate Videos?”
If I’m using my 1DX Mark II with a lens that has autofocus, then I’ll usually just use the autofocus. But some rooms with plain white walls are big windows looking into the sun will throw off the auto focus so I have to use manual focus. Or in my case, because I use a manual lens in the Laowa 12mm, I set the focus manually for each shot. I do this by finding the point in the room where the middle of my shot will be, I will then set focus on the back wall or the center of my frame, aka whatever I want the viewer to be focusing on, then I’ll back up, record, and glide into the room until I’ve walked past that main point of focus. So technically, the shot isn’t in perfect focus the whole time, but it is for the the main part of the shot AND when you use wide angle lenses guys, most everything is in focus anyway, so you really have a lot of leighway to move forward and backwards and still have most everything in focus. SO in short, use a wide angle lens, and just make sure the room as a whole is in focus, and you should be good.
Tip #8
What are the best ground/drone movements to use in Real Estate?
For the drone:
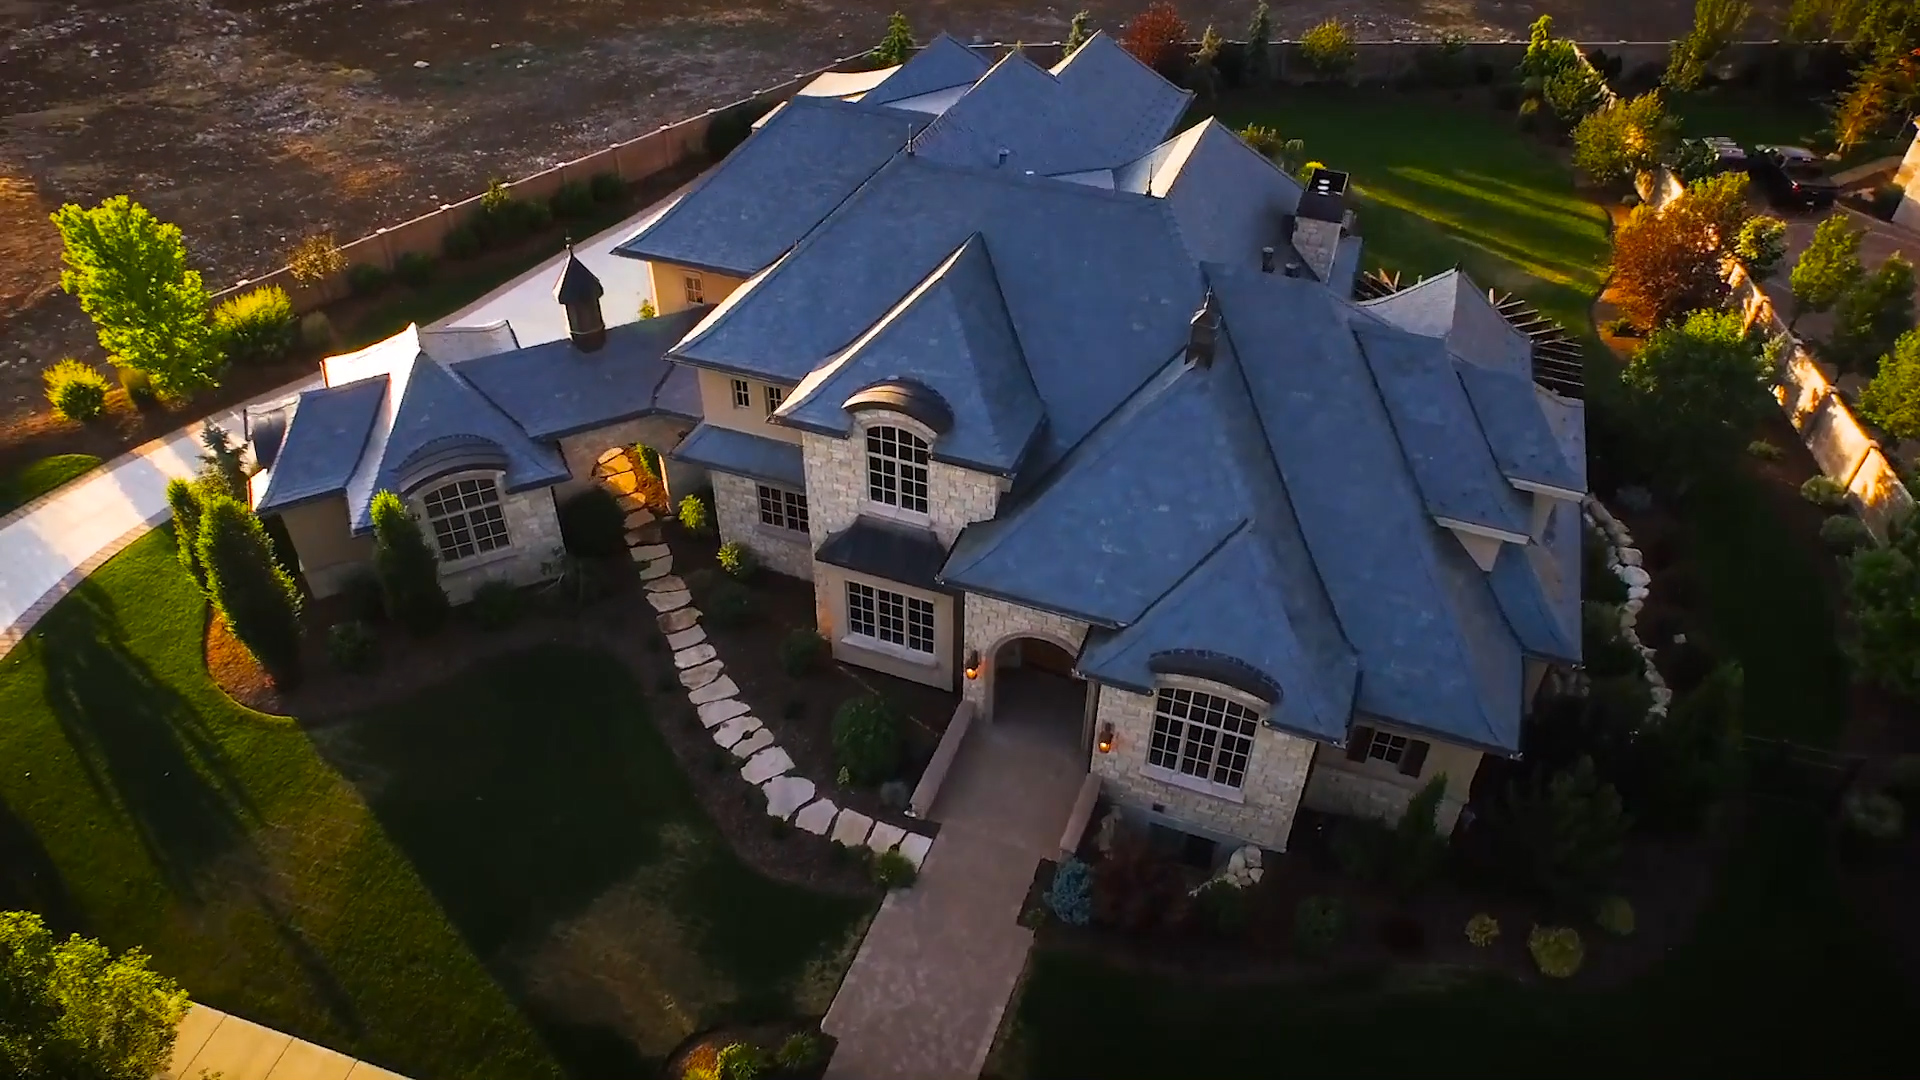
- I like to use Push In shots looking straight on the front of the house for my Intro clip,
- A Pull out from the front or back of the house as the outro
- I like to get a few Parallax shots around the whole outside of the house, filling the frame with the house
- Then I’ll usually grab a couple Rise up while tilting down,
- And at least one Bird’s Eye view of the property looking straight down to show the property lines.
For ground movements, I like to do mostly
- Straight push in shots because they feel the most natural from from a storytelling standpoint. Again I think, If a buyer was touring through the house, they’d be walking forward INTO each room, not walking backwards, so I recommend keeping most of the ground shots moving forward. Like I mentioned earlier, sometimes I’ll add a tilt or if the room opens up more to one direction then I’ll throw in a pan left or right WHILE moving forward.
- And obviously it’s important to keep your movements clean, smooth, and slow, and again I think motorized gimbals are the best tool IF USED CORRECTLY, for real estate movement. And yes, I think movement is important over static shots, because a static shot is pretty much just a photo, which defeats the purpose of having video, so make sure to incorporate some movement to simulate a virtual tour of the home.
Tip #9
LIGHTING: Exposing Properly Indoors/Outdoors and Natural vs Artificial Light
As far as nailing exposure goes, I use my histogram and try get it to read so that there are no blown out highlights. This means that sometimes I’ll have some parts of the interior that are too dark, but then I just bring up the shadows a little in post. If you have rooms with big windows it usually lights up the room enough to where the indoor and outdoor exposures are pretty similar, but for smaller rooms that are mostly lit by indoor light, I tend to let those windows blow out a little more because I don’t want the room to look too dark.
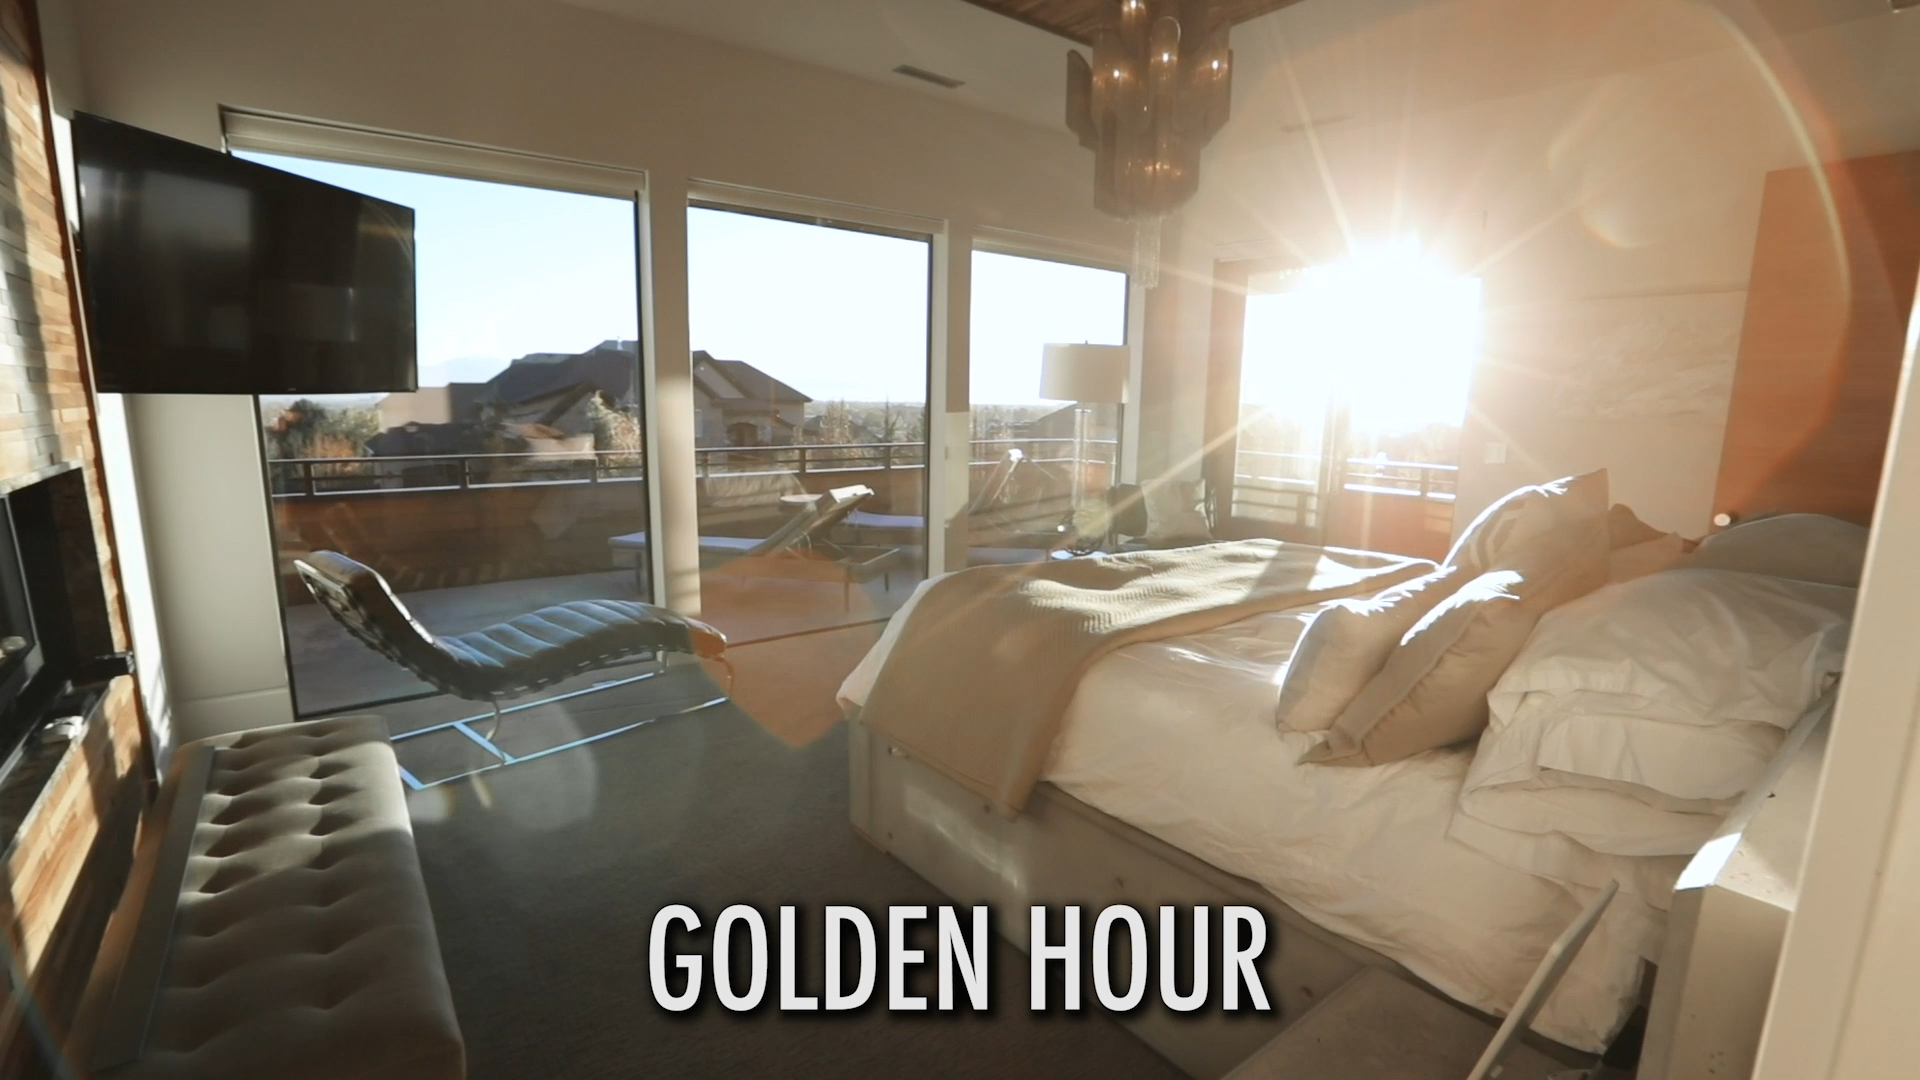
For interiors, the best time I’ve found is when there’s cloud coverage so there isn’t any harsh direct sunlight coming in the house, or as dusk right after the sun sets because there’s still light from outside but it’s not so bright that your windows are all blown out. However, there’s some houses or rooms that have big open windows and you may want to show the sun flaring in through the windows so sunset or sunrise are good times to shoot those rooms. Basically, you can really shoot at any time of day or any type of weather, it really just depends on each room, or each location of the house, and sometimes I’ll shoot the same room at different times of days and just take which ever lighting scenario looked better.
As far as using artificial lights, I have tried it before, but it’s super time consuming to drag lights into each room, and will double or triple the amount of time it takes to shoot the house if you light it right and most sellers and agents don’t what you there 2-3 times longer, they want you in and out so they can get on with their days, so I personally just use natural light.
For shooting outdoors, sunrise, sunset and dusk are typically the best times to shoot lighting wise, however, if the house is up against a mountain so there’s no golden hour or if there’s a lot of trees that shade the house and yard, then it might look better to shoot mid day when there’s less shadows.So just kind of depends on the house’s position and surrounding landscapes. To put it simply, just do what looks best. And again, I’ll usually shoot the exterior and interior at different times of day and use which ever lighting scenarios look best.
Tip #10
What order do I shoot in and How Long does it take to shoot?
Typically I show up at the house around 4 or 5 pm, shoot exterior for an hour or two, then go inside and shoot interior for an hour or two, and by that time, it’s golden hour so I’ll go back outside and shoot the exterior again for a half hour in golden hour light, then run inside and grab any rooms that may look better with golden hour light, then as soon as the sun sets, grab a few more interior shots that may look better at dusk, and about a half hour into dusk as it starts getting darker, run outside and grab a few drone shots showing the house lit up if it has a lot of lights to show off. So it’s really a back and forth getting different rooms or different angles of the exterior in different types of lighting just to give myself some options and taking the best looking shots.
And then I’ll usually wrap up around 9 o clock making the whole shoot about 4 to 5 hours.Again, smaller homes will take less time than that, and larger homes a little longer than that. But be respectful of everyone’s time and try and do it as quickly as possible.
And as a bonus tip that we cover inside the Real Estate Video Pro Course is that the edit is equally important to the footage you shoot. And I had a lot of questions about the editing process, like what should the total length of the video be?, Should you use a voice over or on screen text?, What order should you put the clips in?, Where do you find real estate music and Sound effects?, How do you do your transitions? What are your export settings, And so on. So if you want to learn my top 10 tips to EDITING real estate videos, you’ll have to join the Real Estate Video PRO mini course. Also included in the mini course is an hour long video showing my full editing process for one of my clients so you can see everything I do from beginning to end,
Inside the course, I provide you with the raw footage and a premiere pro project file from one of my real estate videos so you can get an inside look to see everything I do in the editing room, 3 different virtual job shadow videos walking you through my whole day of shooting 3 different properties with different stabilizers, I also share with you The TOP 10 Mistakes I see my students making in real estate videos, I provide several feedback videos showing me breakdown student’s real estate videos so they can know what to improve, I also give you 10 of my favorite real estate songs that I like to use and where you can license them to save you time on searching for music, And I also share with you my favorite Ronin S gimbal settings & my favorite drone settings for smooth cinematic shots.
And lastly I throw in our smooth zoom transition premiere pro present pack.
So if you’d like to up your real estate game, you can sign up today for this 4 hour mini course by clicking HERE.
But that’s it guys, hope these tips were helpful, don’t forget to subscribe to my Youtube Channel for more goodies, and if you have any further questions, please let me know!
