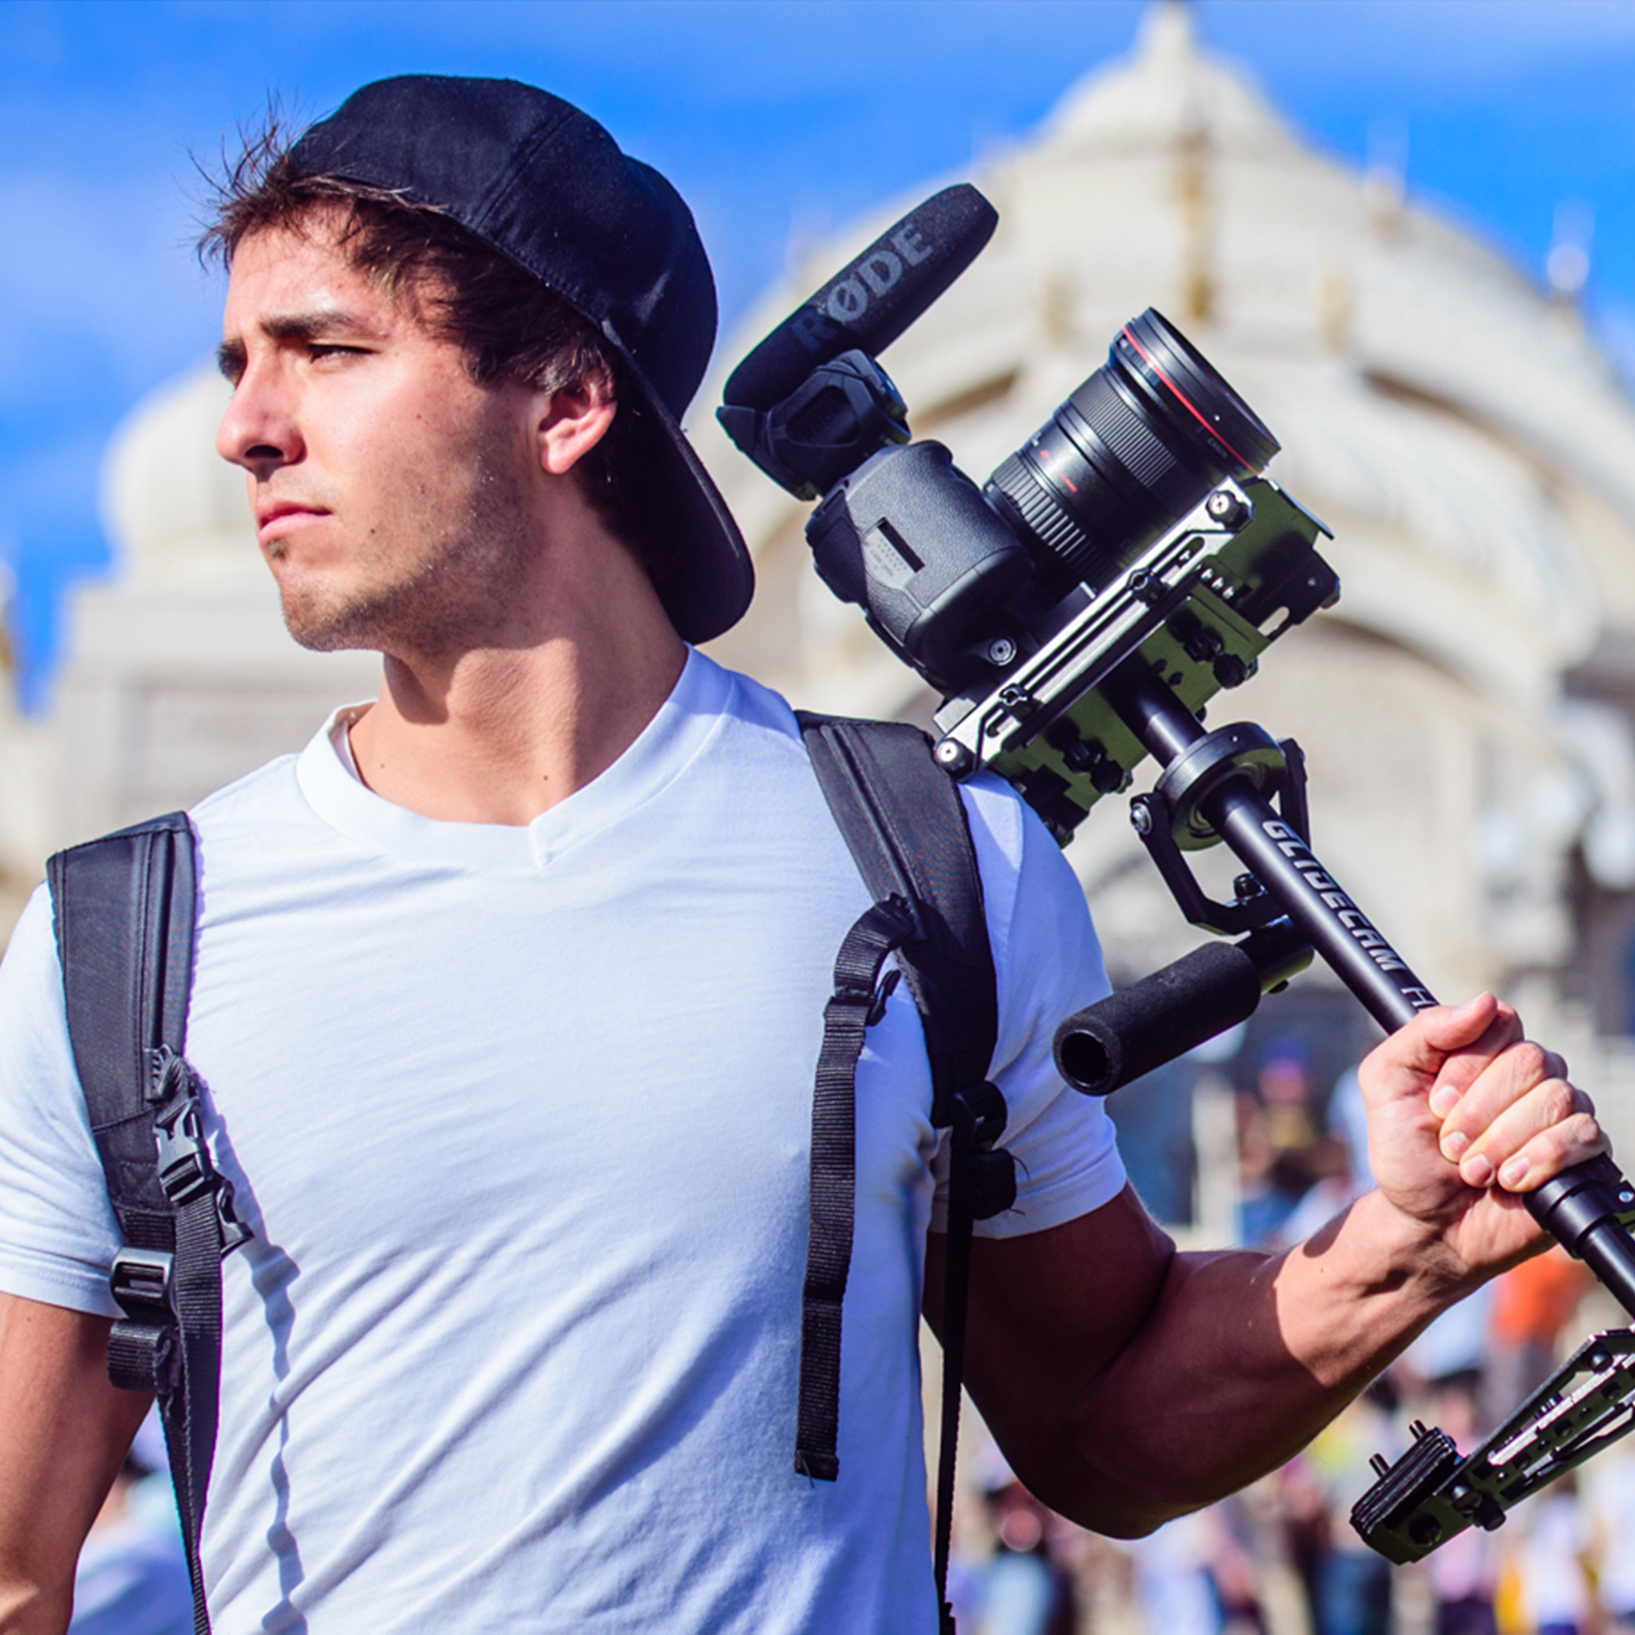
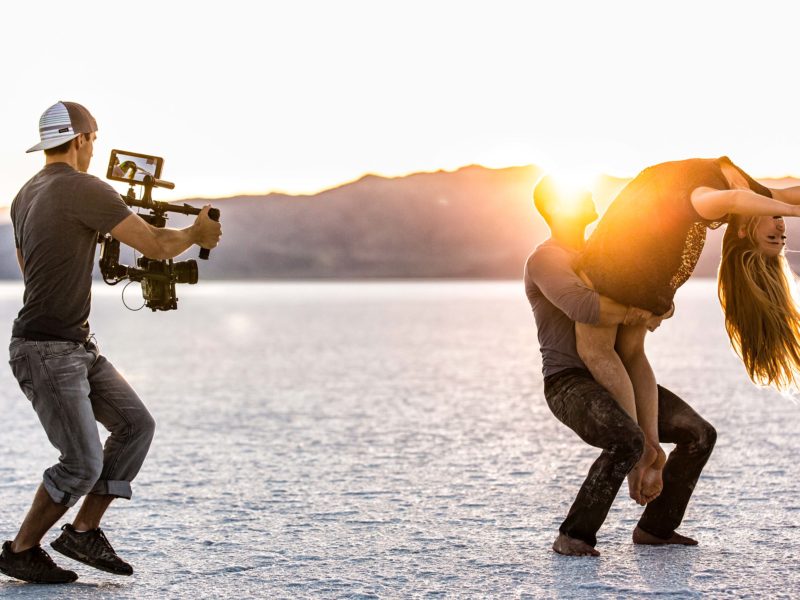
For anyone trying to decide between going to an expensive film school or watching frustrating youtube videos, let me give you a third option: Full Time Filmmaker. It’s an online course that can be consumed in less than 24 hours, yet gives you the resources and support to start a successful video production company in just months.
To get an idea of what this course is all about and what it covers, I’ve put together a free 1-hour training that covers my top 10 secrets to achieving cinematic shots, along with my 6 steps to making money. You can sign up for the next session HERE.
This article is a summary of the 1-hour webinar for those who may not have the time to watch, or have already watched and have come back to review the notes.
But before I start sharing all my secrets to success, a little bit about me:
 My name is Parker Walbeck, I’m 28 years old, based out of Salt Lake City, UT. I spent about 3 years working with a Youtuber named Devin Super Tramp, where I had the opportunity to travel all over the world creating content for top name brands, and have since started my own production company creating content for companies like Hyundai, LG, Canon and many more. Within just a couple years I’ve grown a youtube following of over 400,000 subscribers and receive sponsorship offers daily.
In a nutshell, I’ve learned what it takes to create high quality video and attract high paying clients, and I’m excited to share my insights with you right now:
How did I get started?
Five years ago I had zero filmmaking education, zero experience, and I didn’t even own a camera. One day I came across a video on YouTube by a guy named Devin Super Tramp who made videos for a living. I immediately fell in love with what he was doing.
So I dove in head first and spent my life savings on buying my first Camera set up:
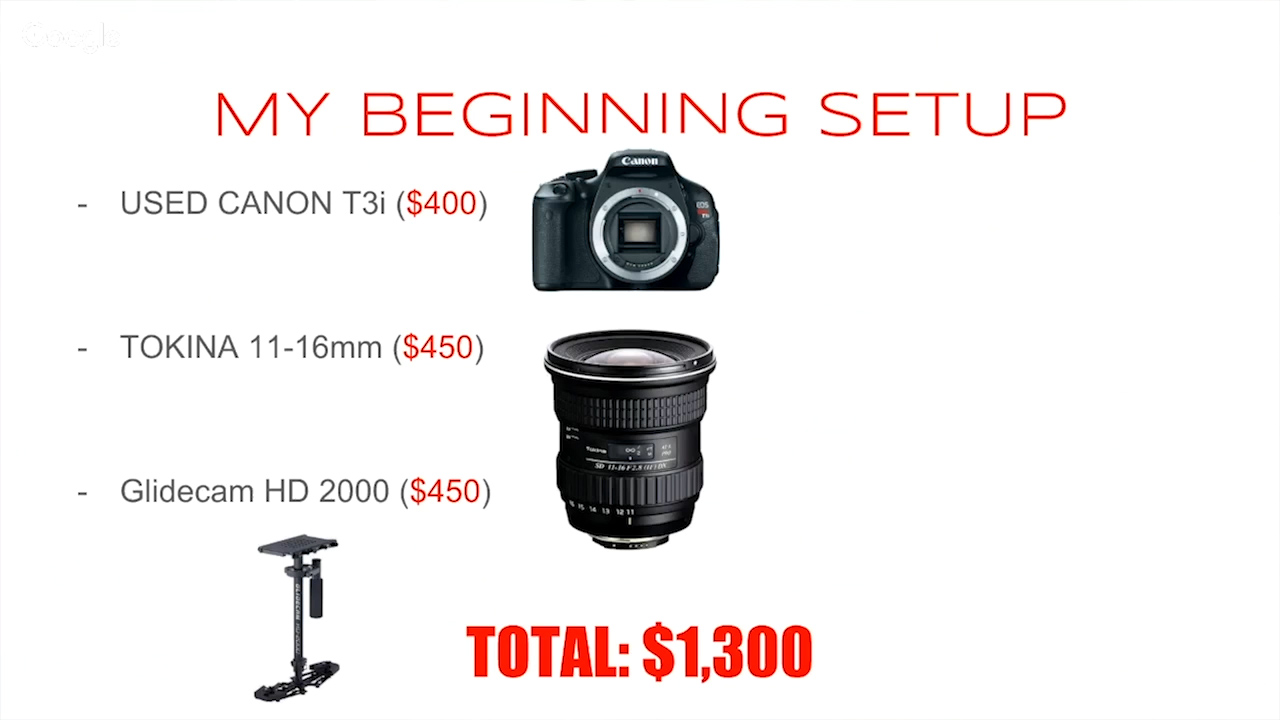
But as soon as my gear arrived, I realized that I had no idea how to use it, and so I spent months watching frustrating YouTube tutorials trying to teach myself how to do everything. (This is why I created Full Time Filmmaker, I’ve been where you are, I know how frustrating it can be.)
FAKE IT TIL YOU MAKE IT! (Be Confident)
After three or four months of tutorial watching and learning by trial and error, I took my limited knowledge down to SUU where I was attending school at the time. The first event of the school year was this awesome paint dance, and while dancing with my friends, I noticed that nobody was filming the event, and immediately recognized it as an opportunity to pose myself as the professional filmmaker on campus. So I ran back to my car, grabbed my camera gear, jump over the fence, hopped onto stage and just “Fake’d It Til I Made It“!
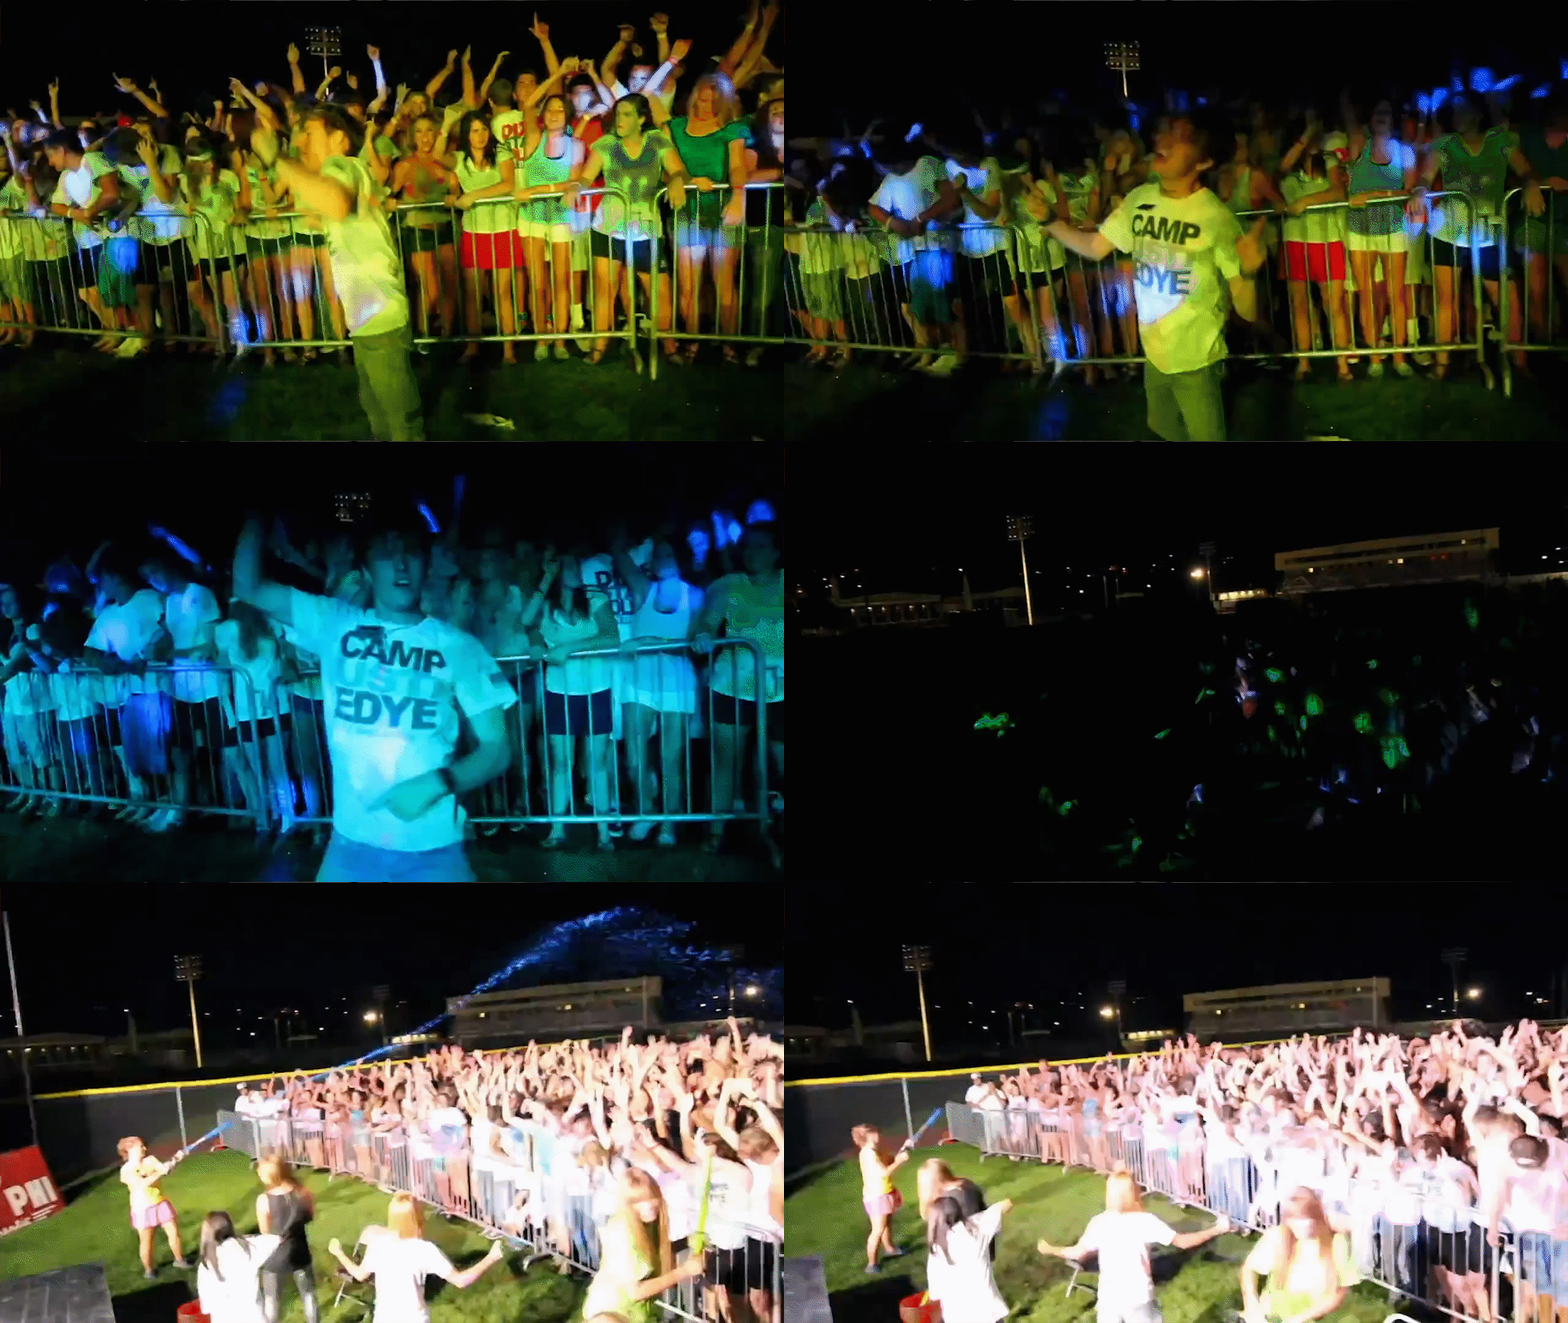
I then took that footage home, pulled an all nighter editing together a video, posted it to youtube the next day, and everybody started sharing it like crazy. Everyone loved the video, including the administration, who saw the video, pulled me into their office and said, “We would like to offer you a scholarship to film the rest of our events for the rest of the year.”
This led me to start creating content on a regular basis, which led me to attract more paying clients with my growing portfolio, which through a series of miraculous events (watch the webinar to hear the full story) helped me land a job working for the very guy who inspired me to start in the first place: Devin Super Tramp.
Devin took me under his wing, mentoring me and helping take my skills to the next level as I traveled the world with him shooting/editing for big name brands.
After 3 awesome years at Devin Super Tramp, I broke off to start my own production company and youtube channel. As my following grew, the questions poured in. Everyone wanted to know “How I get smooth shots”, “What are my camera settings?”, “What’s my editing workflow like?”, “How do I land big clients?”, etc.
So I took these hundreds of questions and I organized them chronologically, from beginning to end, everything one would need to know about how to start their own video production company.
I then scripted over 100 pages of answers, and spent the next 6 months filming and editing training videos into what is now Full Time Filmmaker: over 100 organized training videos and it’s growing every month as I’m always adding more videos to keep the learning relevant and up-to-date.
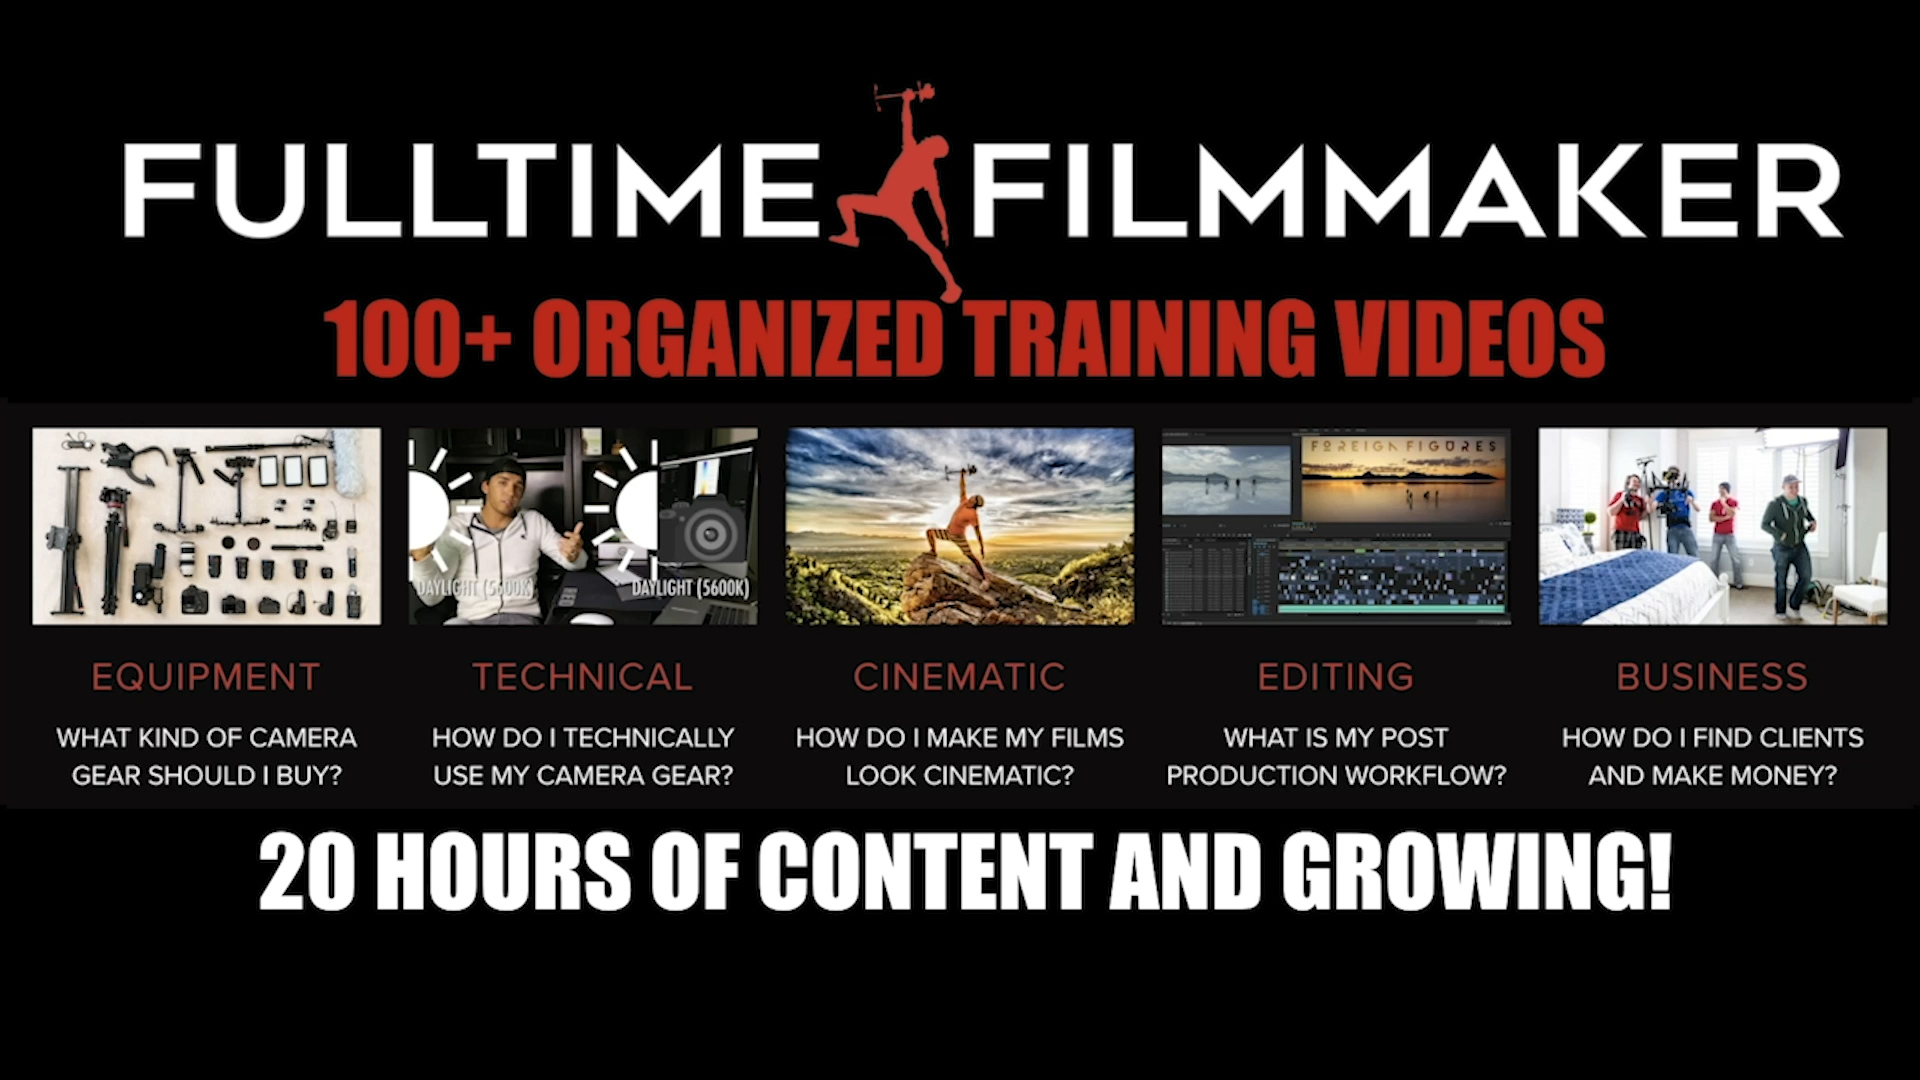
So that’s just a quick intro to who I am and how Full Time Filmmaker came about, but I now want to share with you some of the content inside the program to give you an idea of what the course is like.
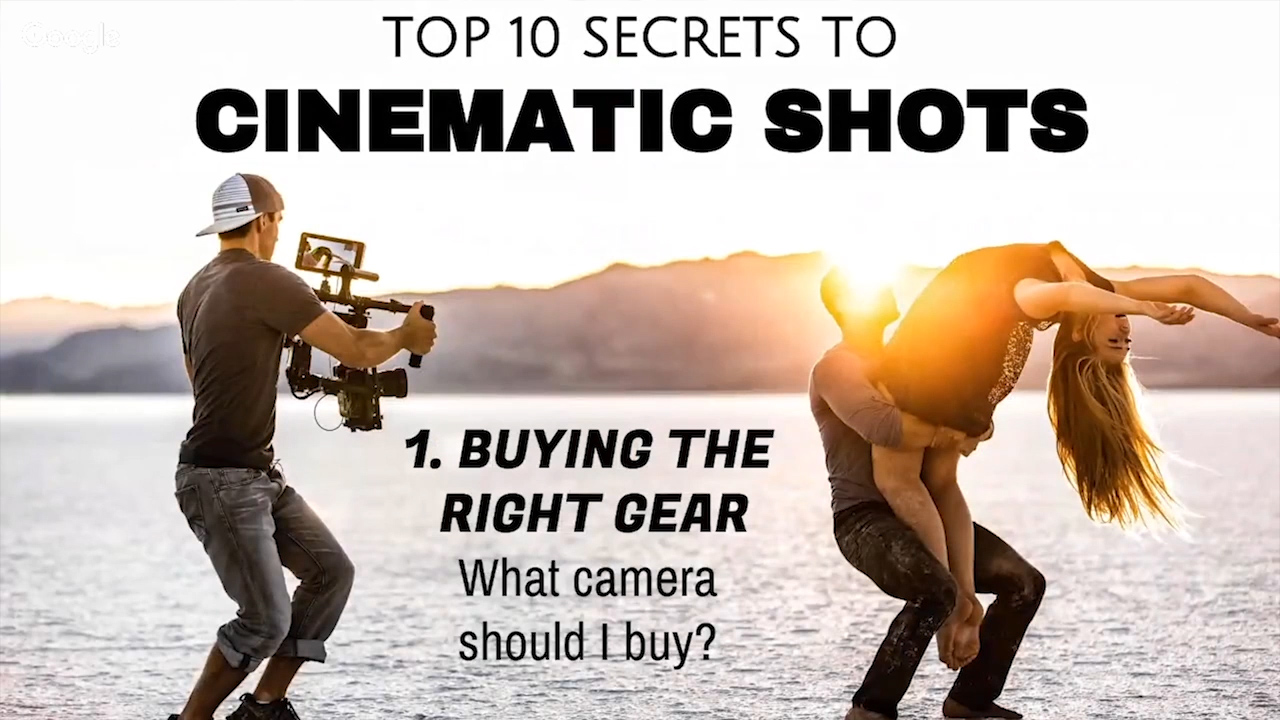
CINEMATIC SECRET #1: Buy the Right Gear
People always ask me “What camera should I buy?”
My response is always:
“What are you going to be shooting and what is your budget?”
There’s so many variables to consider and we cover those in-depth in the course, but here’s some of my top camera recommendations in different price ranges:
BUDGET: $0
If you don’t have any money to invest in gear yet, then just use your smartphone! Most smartphones have great cameras nowadays, so you can get started creating content by just using the camera already in your pocket. If you don’t believe me, check out my iphone vs RED or LG V30 vs RED videos on youtube, where I show iphones and androids achieving similar results to that of a $50,000 cinema camera:
BUDGET: $500
For around $500, you can get a beginner DSLR and kit lens. The best beginner camera I’d personally recommend is the Canon SL2. You can see all my reasons why by in this video below
There are other great beginner options out there like the Panasonic G7, but I personally like Canon cameras for their amazing in-camera colors, their superior auto focus, and their great lens options. But every manufacturer is going to have pros and cons.
BUDGET: $1,000
For camera body only, I recommend the Panasonic GH4, the Canon 80d or the Sony a6300, each great for different reasons like sensor sizes, resolutions, frame rates, etc. However, I’d start to look into getting a nicer lens and a stabilizer too. Lenses are just as important as the camera bodies. And we’ll talk more about lenses and focal length later on. For stabilizers, I personally love and recommend the glidecam HD 2000. There’s also a lot of motorized gimbal options available as well for a similar price. Check out my comparison of the Glidecam vs. the Zhiyun Crane 2 and the PROs and CONs to each by clicking here:
BUDGET: $2,000
The Panasonic GH5 (and GH5s) is probably the best bang for buck quality image for the price. Very popular choice. The Sony a7iii is also a very popular choice and produces great images for the price.
BUDGET: $3,000
I’d say your best options are the Sony a7s ii, which is amazing in low light for shooting events like weddings, or the the Canon 5d mark 4. Both of these cameras are full frame sensors which gives you more shallow depth of field compared to smaller sensor cameras like the GH5.
BUDGET: $5,000
The Canon 1dx mark 2 is my favorite (go-to) camera. It shoots 4k at 60 frames per second and has the most amazing in-video autofocus tracking systems on the market.
BUDGET: $7,000
Now if you’ve outgrown the DSLR world and are looking to get into higher end cinema grade cameras, A couple good options would be the Black Magic Ursa Mini, The Panasonic EVA-1, and the Canon C200.. Again each with their pros and cons.
BUDGET: $10,000+
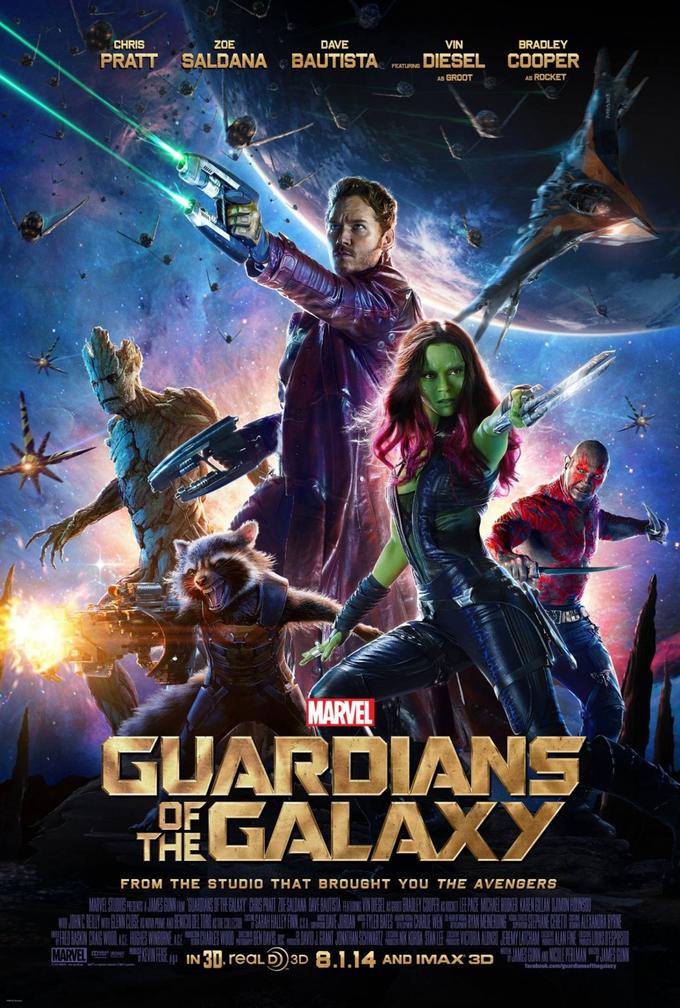
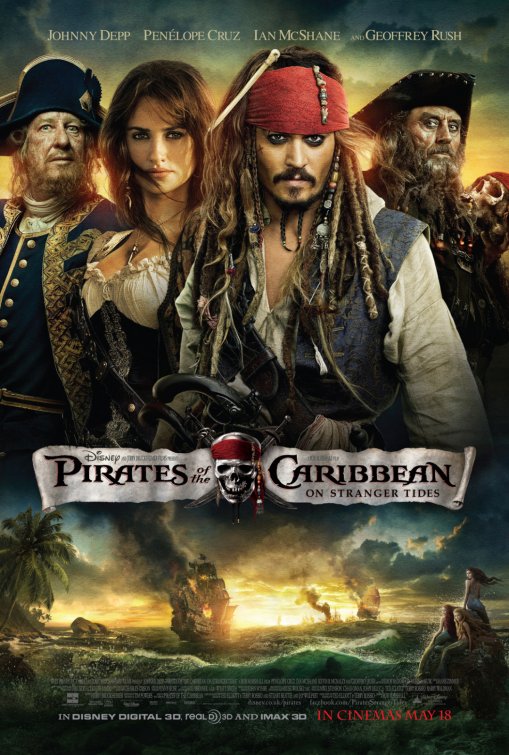
RED cameras are the most popular choice (amongst online content creators) for high end cinema cameras. I personally own a Red Weapon 6k camera, however these cameras are going to cost you anywhere from $30,000 to $80,000. RED cameras have been used to shoot popular Hollywood movies like Guardians of the Galaxy, Pirates of the Caribbean and many more.
So there you have a look at my top gear recommendations, keep in mind though: it’s not the camera but rather the skills/creativity behind the camera that matter most. I always tell people, it’s pointless to buy an expensive camera if you have no idea to use it. And that’s why I put Full Time Filmmaker together, to teach people the skills they need to know how to take advantage of the gear THEY ALREADY HAVE, instead of spending thousands of dollars on “better” gear, in hopes that that will magically make their videos look more professional.
So let’s now talk about some of those skills:
CINEMATIC SECRET #2: Choose the Right Settings
Here’s some of the settings I recommend to achieve the “cinematic look”:
Frame Rate
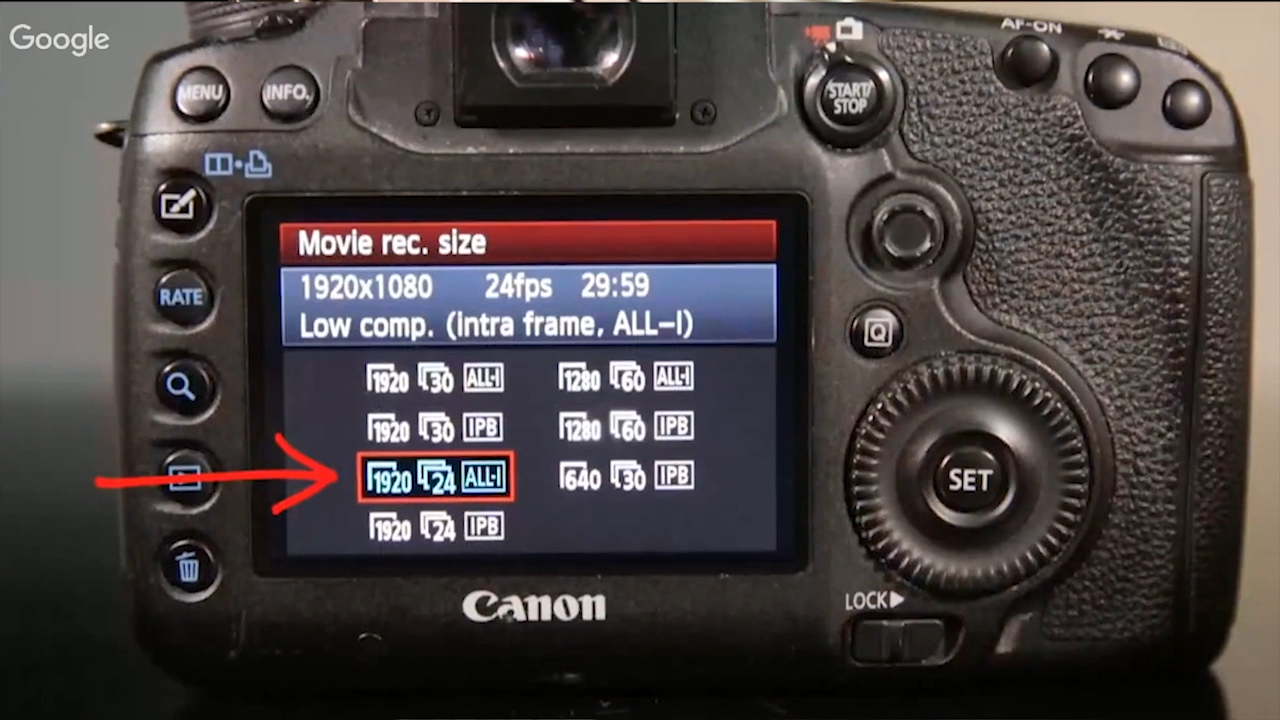
Shoot at 24fps (frames per second). This is what they shoot most Hollywood films at and what your eyes are used to seeing when it comes to high quality films. A lot of people start out at 30fps because it looks “smoother”, but this gives you a “soap opera” or a “TV news broadcast” look. There are times that I shoot higher frame rates than 24 (like 60 or higher) but only if I plan on slowing it down to 24fps in post. (I cover this process in the course)
Picture profile
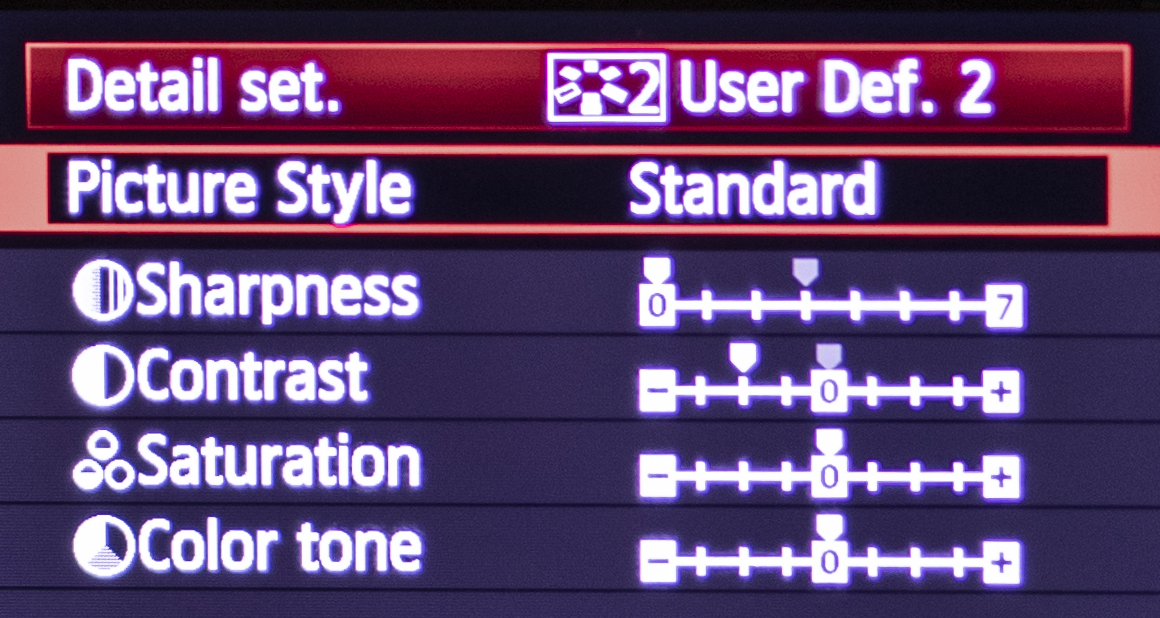
80% of the videos I shoot with Canon cameras on a Standard Profile with sharpness turned all the way down to 0, contrast turned down 2, saturation at 0, and color tone at 0. These settings will give you a super vibrant, true-to-life, happy look (The look I often prefer).
Other times, when using my RED Weapon, I shoot a raw flat profile (unsaturated and non-contrasty) which will help you retain more dynamic range and overall detail, giving you more control over your image to color grade in post. And we’ll talk about coloring later.
But if you’re new to color grading and/or don’t want to spend a lot of time in post, I recommend using a profile that looks good straight out of camera like the one above.
White Balance
I highly discouraged shooting anything AUTO in-Camera. Learn how to use your manual settings. As a rule of thumb, when you’re outdoors with direct sunlight, you want to be between 5500-6000 Kelvin. If you’re indoors using only artificial lighting, you usually want to be between about 3000-4000 Kelvin.

ISO
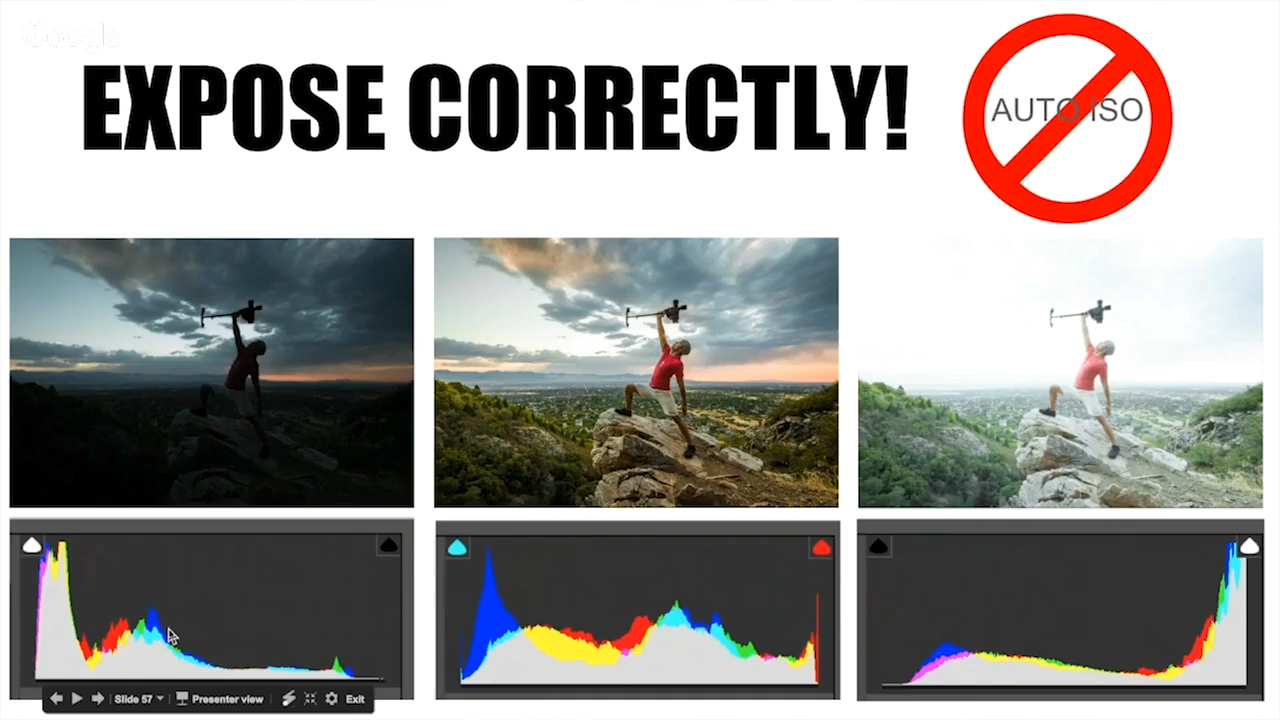
Another auto settings to avoid is: Auto ISO. Below you see three photos, each with a different exposure. Oftentimes if you use Auto ISO, it will either expose for the sky and underexpose everything else or it will expose for the darkest part of your image and overexpose the sky. But if you manually expose, you can decide your exact exposure.
CINEMATIC SECRET #3: Get Smooth Shots
People always ask how I achieve such smooth shots with a glidecam (or a motorized gimbal), so I’m now going to touch on my 4 keys to getting smooth shots:
Key #1 – Get Balanced!
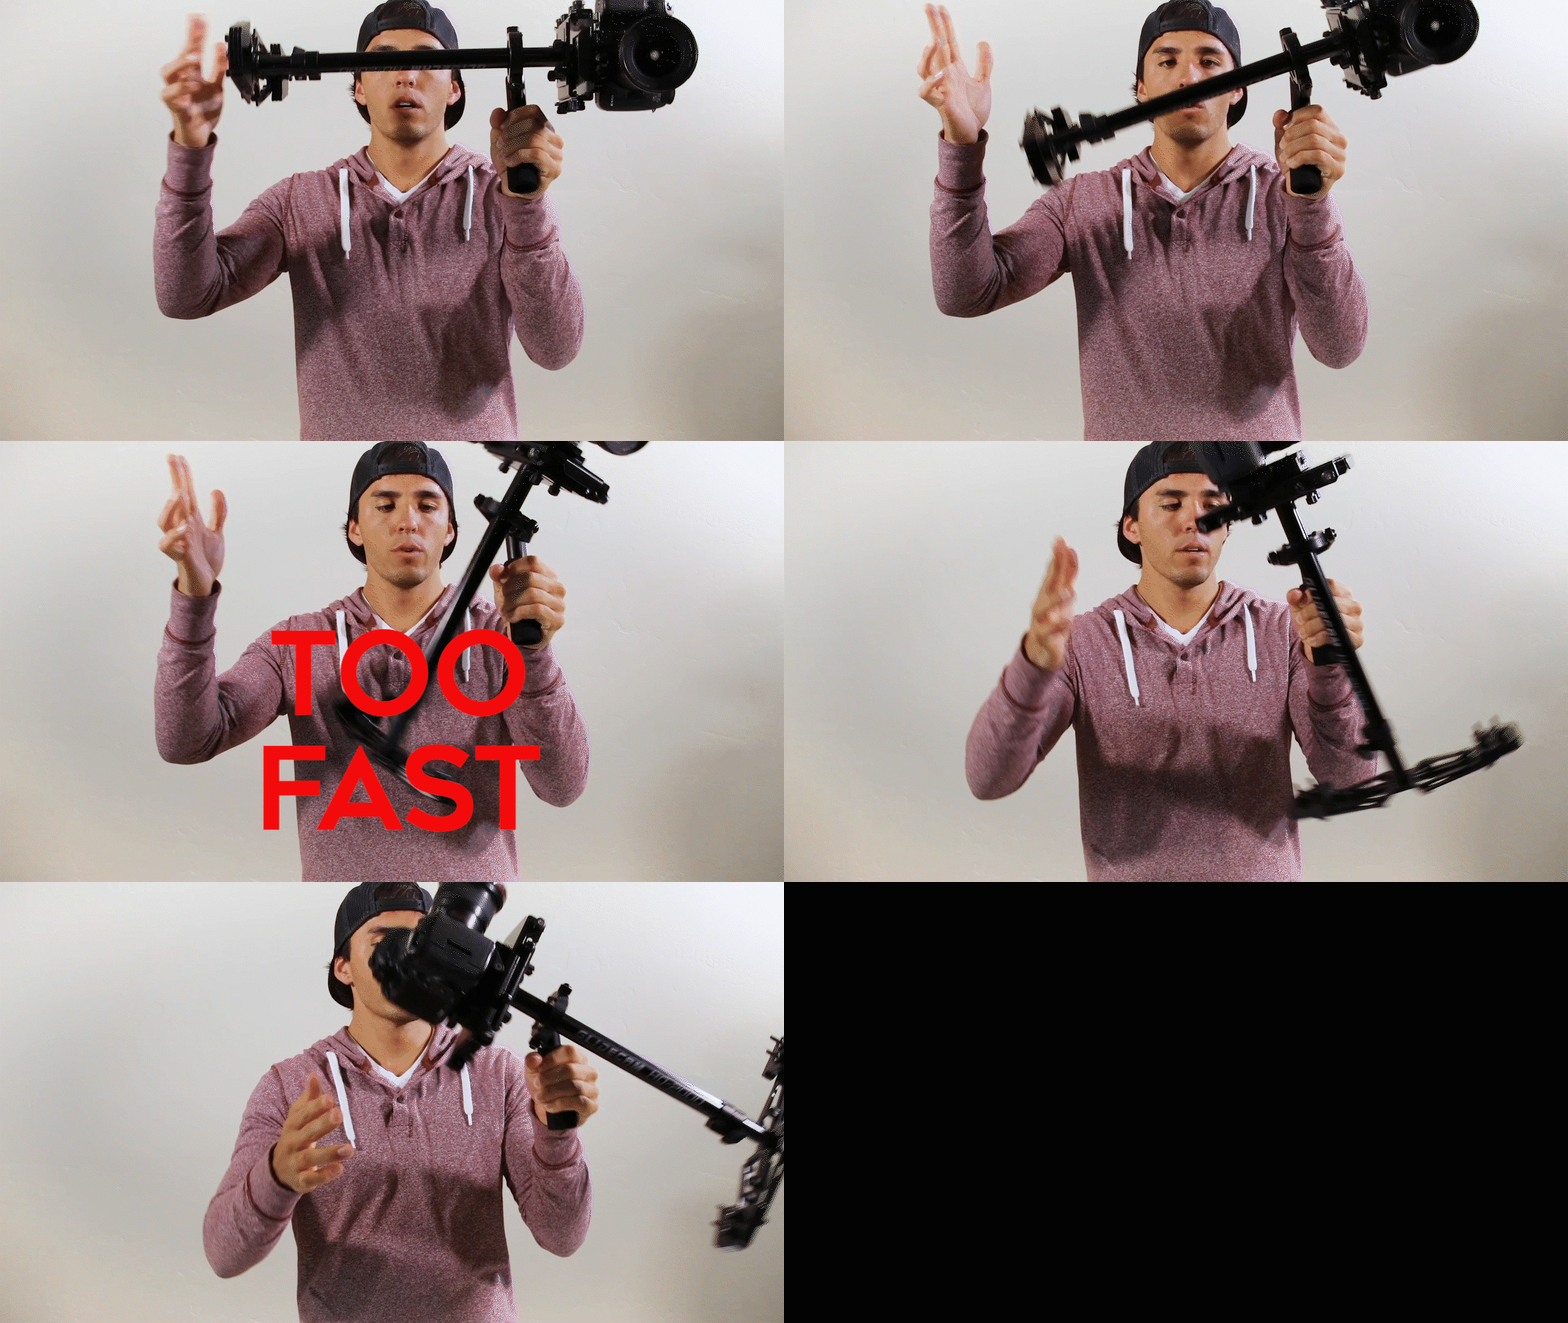
Every gimbal as 3 points of balance: Left to Right, Front to Back, and Top to Bottom. With the last one, the biggest mistake I see is people having a “droptime” that is TOO fast. The droptime is the amount of time it takes your glidecam to go from horizontally to vertically. I prefer keeping the droptime around 2 seconds, and this will ensure that your glidecam doesn’t sway back and forth as you walk.
Key #2 – The Off Hand
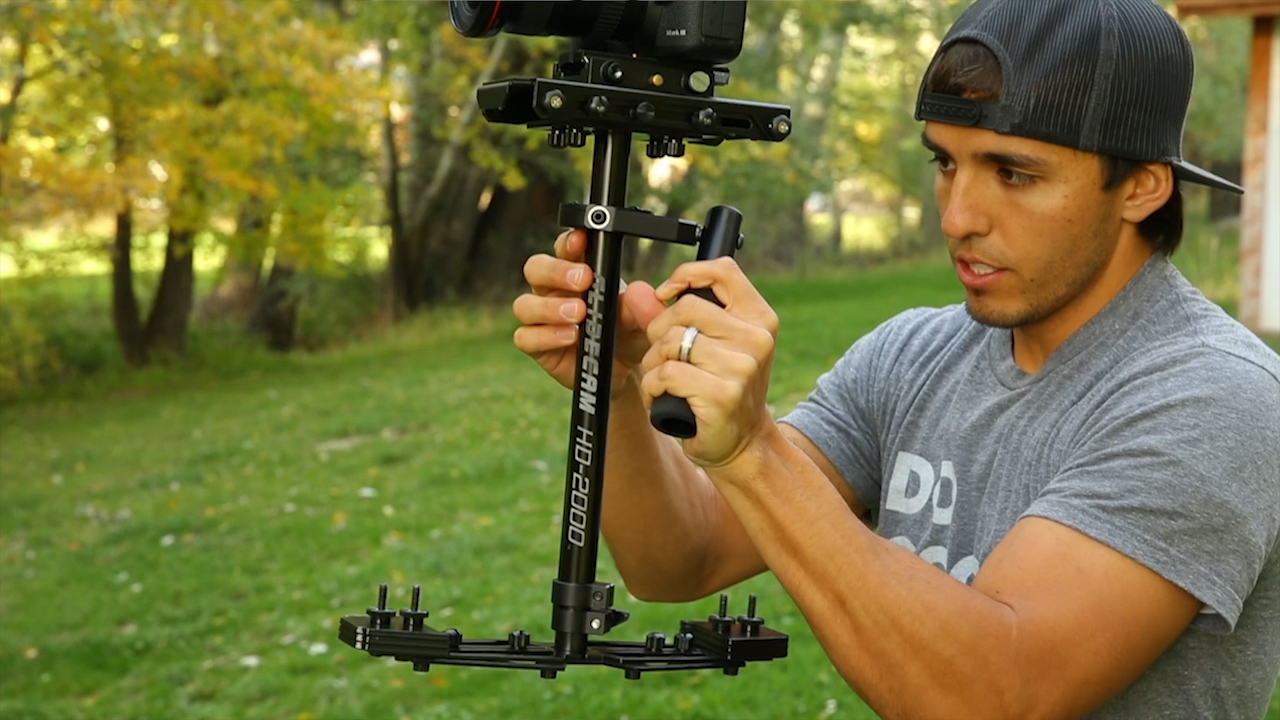
I holding a glidecam with my left hand even though I’m right handed. I personally recommend holding the glidecam up with your least coordinated hand and finessing or steering the glidecam with your best hand. My right hand has three or four fingers out front, my thumb behind and I am barely touching the shaft. The less you have to steer with that off hand, the smoother your shots will be.
Key #3 – Lens Choice
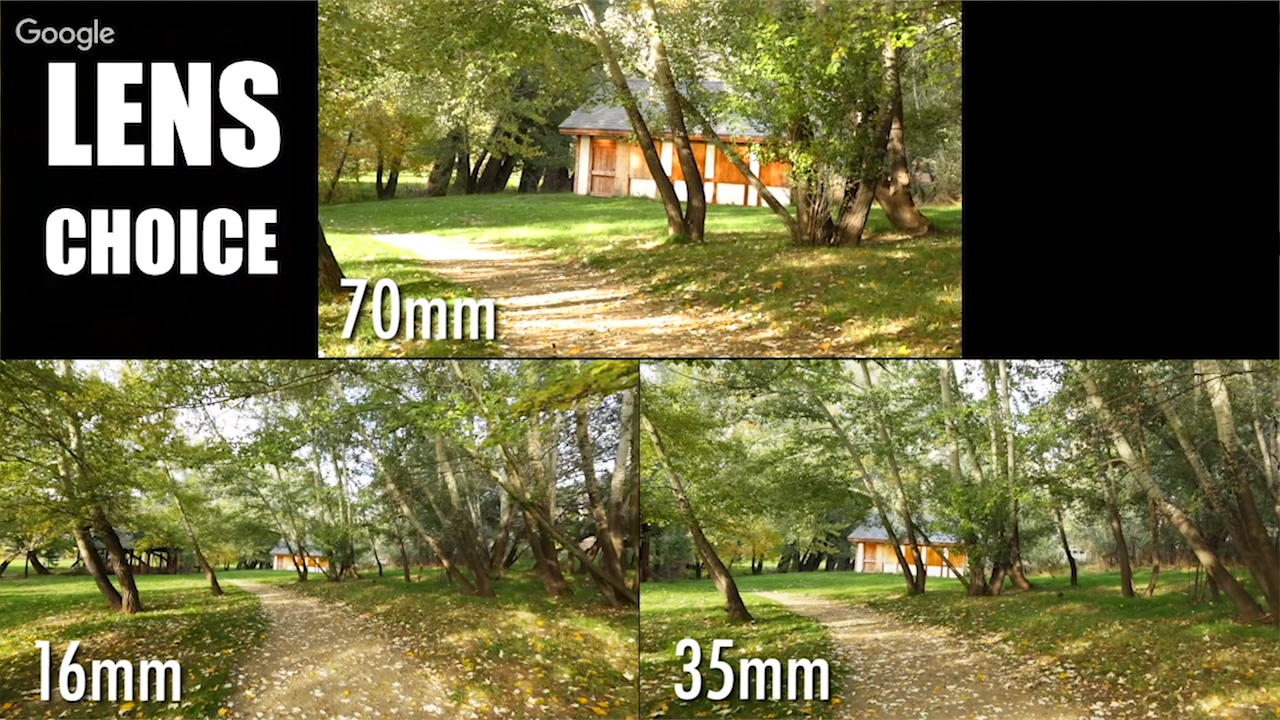
For starters I recommend using wide angle lenses. This will give you a wider field of view making it less apparent when there is camera shake. I personally will glidecam with focal lengths as high as 100mm but that’s because I’ve practiced thousands of hours. So start wide and work your way up to tighter focal lengths as you improve.
And Key #4 – Pregnant Walk.
Pretend like you’re carrying a hot cup of coffee across a room and bend your knees like shocks to absorb your footsteps. Yes, this will make your legs tired after a long day of glidecamming, but sooo worth those steady shots…
Those are my 4 keys to smooth shots. I go further in depth in the program, but that should give you a good idea of what to focus on. Now if you’re using a motorized gimbal, the motor acts as your “off hand” so it takes away the need for Key #2 (but gives you less control). The other 3 keys still apply to using a motorized gimbal as well, so it’s important to learn and apply these tips.
CINEMATIC SECRET #4: Create Movement
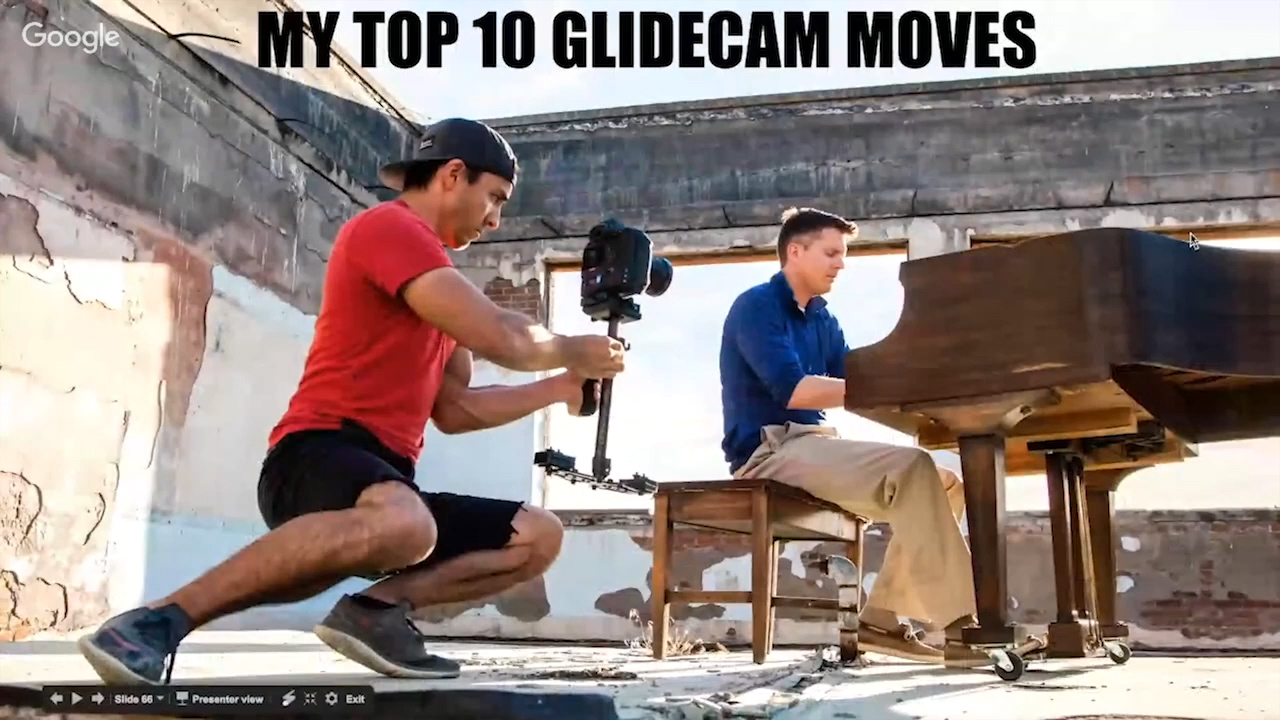
I think the biggest factor that separates my films from so many others, is my ability to move the camera in a way that immerses the audience into the story. And here’s a list of My Top 10 Glidecam Movements I like to use (watch the webinar to see them in action):
- The Push In
- The Pull Out
- The Parallax
- The Rise Up
- The Reveal
- The Tilt Down/Up
- The Change of Focus
- Tracking: Lead/Follow/Side
- In-Camera Transitions
- Low Mode
Diversifying your films with a wide variety of movement can help make your audience feel more immersed and engaged.
CINEMATIC SECRET #5: Create Depth
People often ask what aperture I shoot at. I personally like shooting at 2.8 or lower for most things, and the reason being: When you use a low aperture, it knocks the background out of focus and gives you a shallow depth of field.
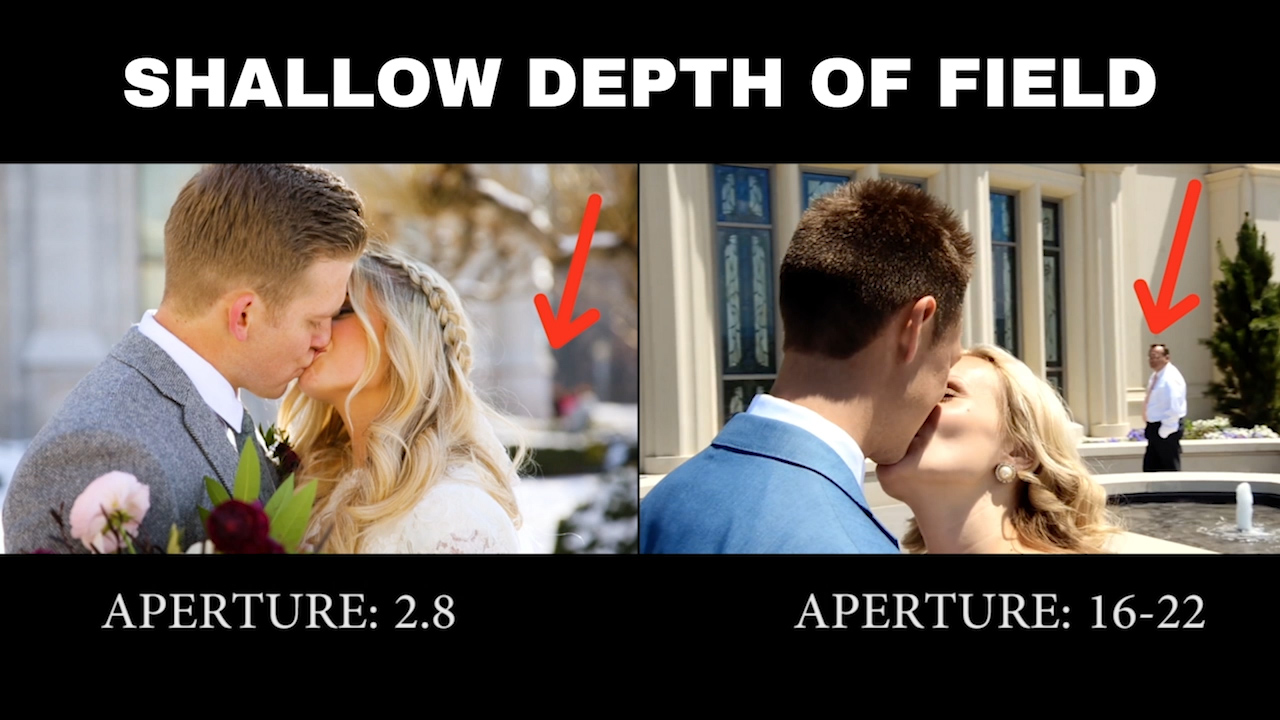
Depth can also be created by using foreground. So anytime I’m glidecaming I’m always looking for some foreground to glide up against to make my image feel more three-dimensional.
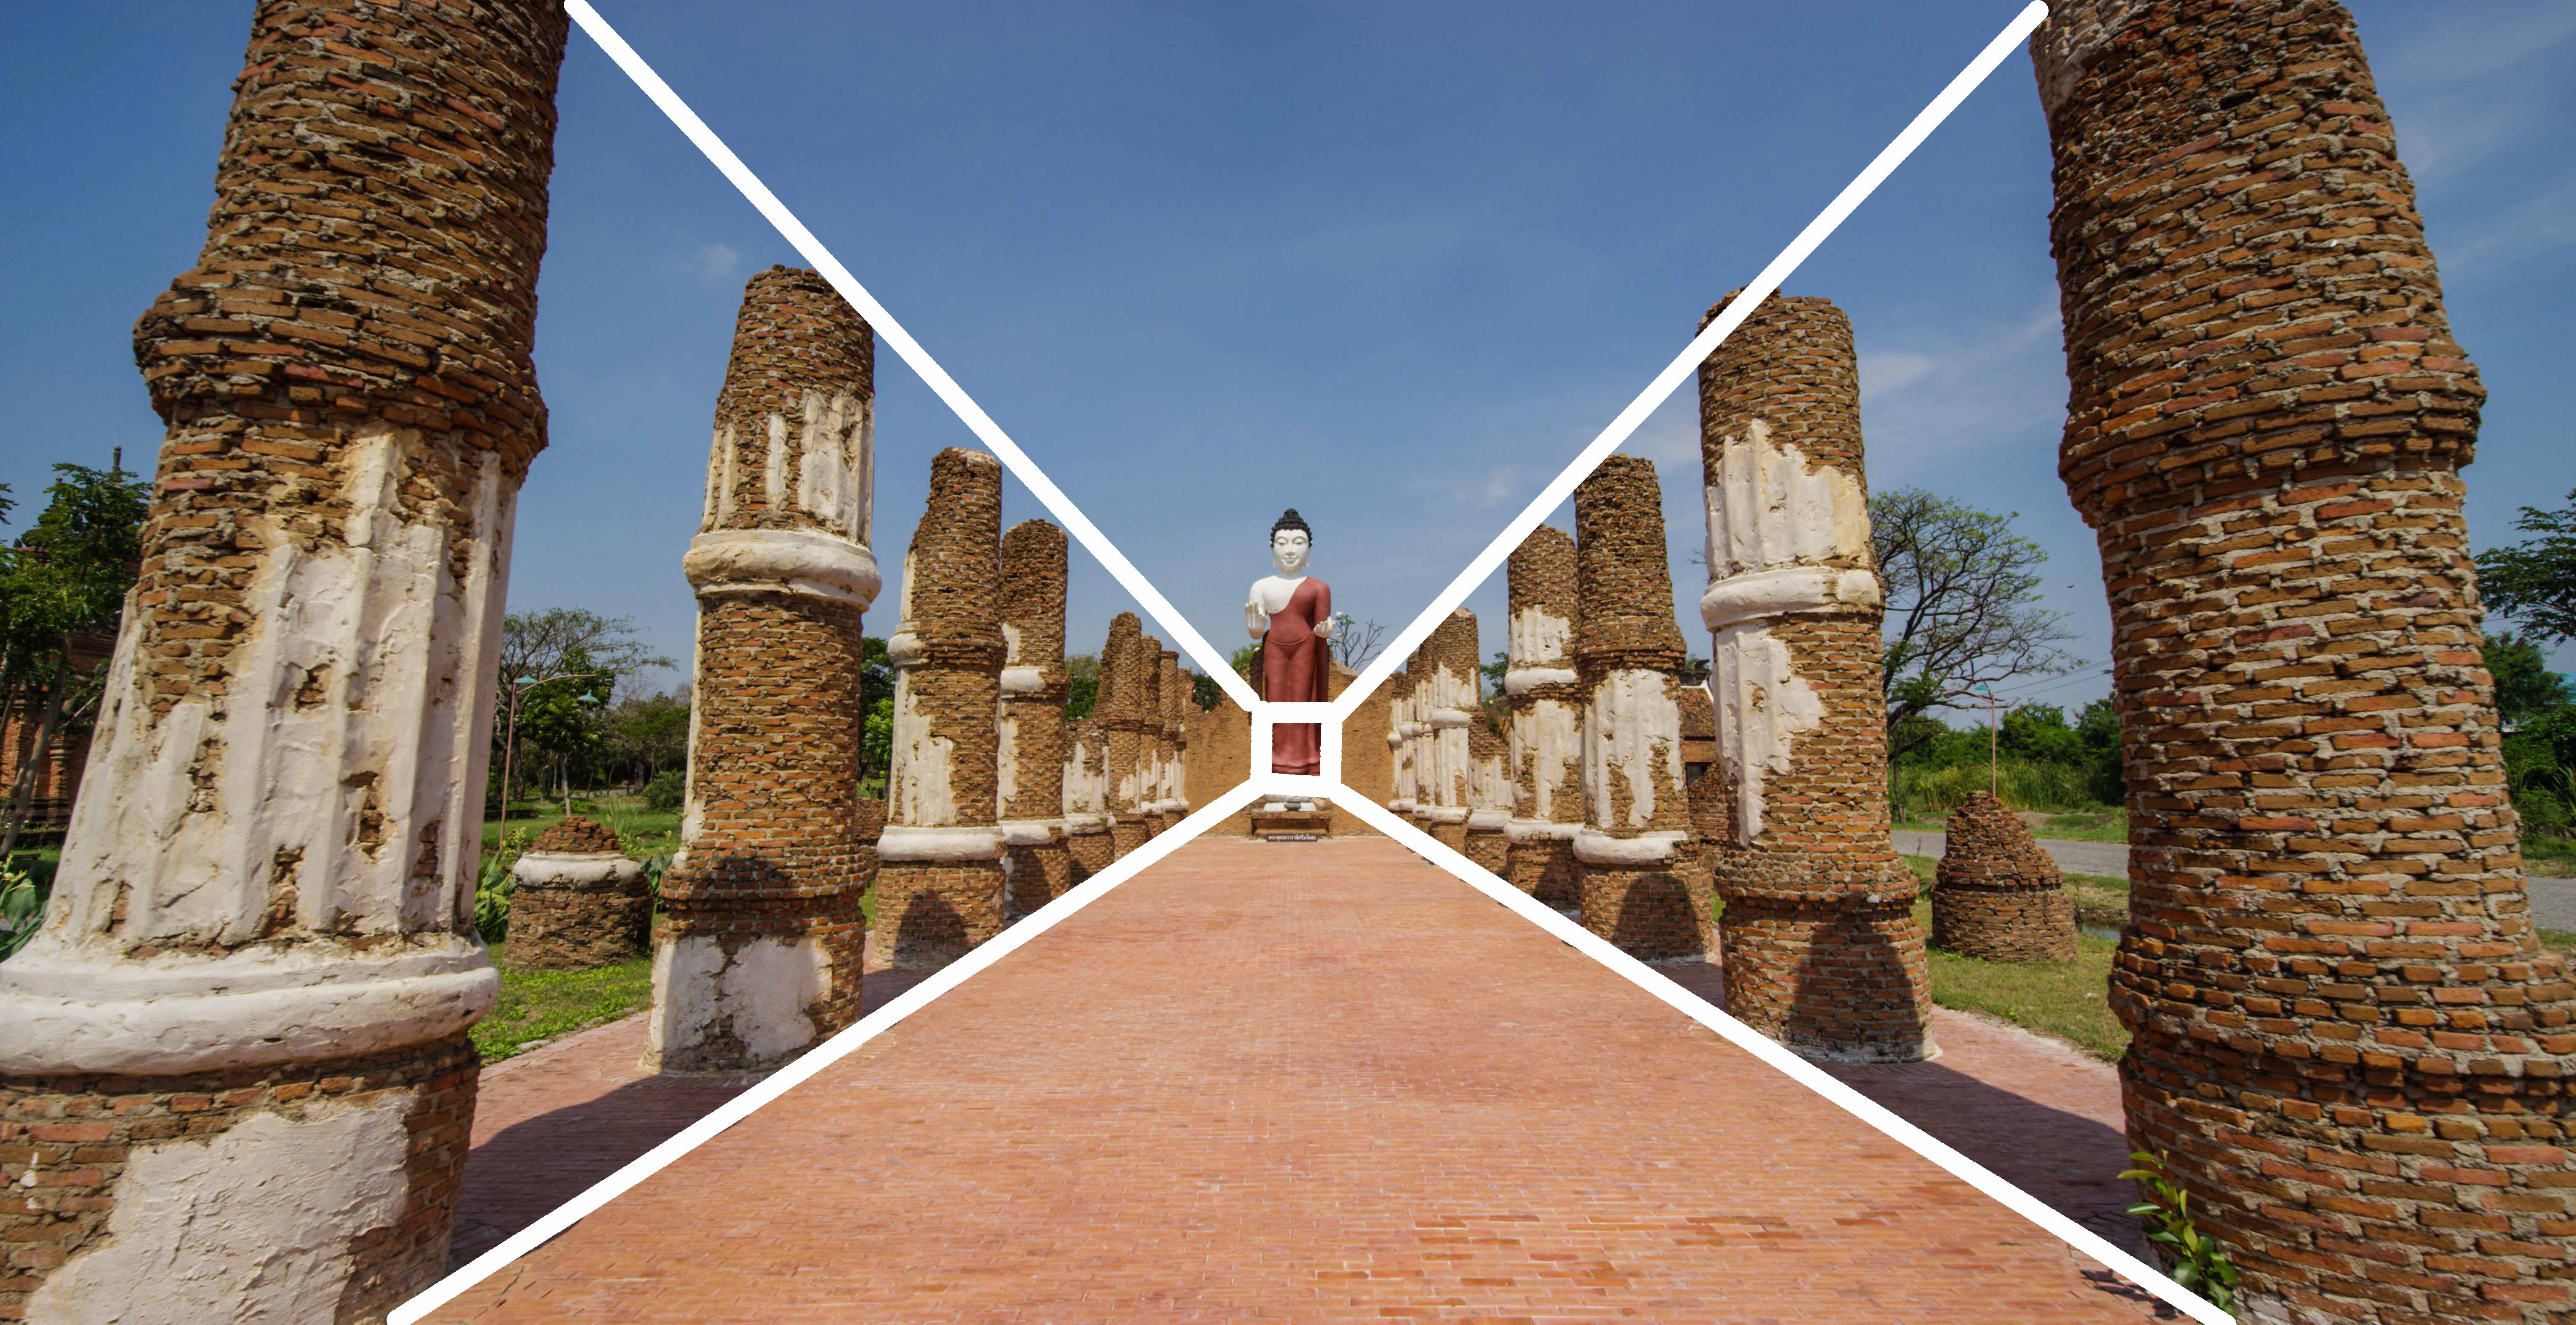
Another tip for creating depth is to look for leading lines. Find natural lines around you like in bridges or fences, or anything that you can find that helps lead your eye to the center of the image, is going to help create depth and make your shots more cinematic.
CINEMATIC SECRET #6: Camera Angles
There are 5 basic camera angles that they’ll teach you in film school:
- The Wide Shot: Usually your establishing shot.
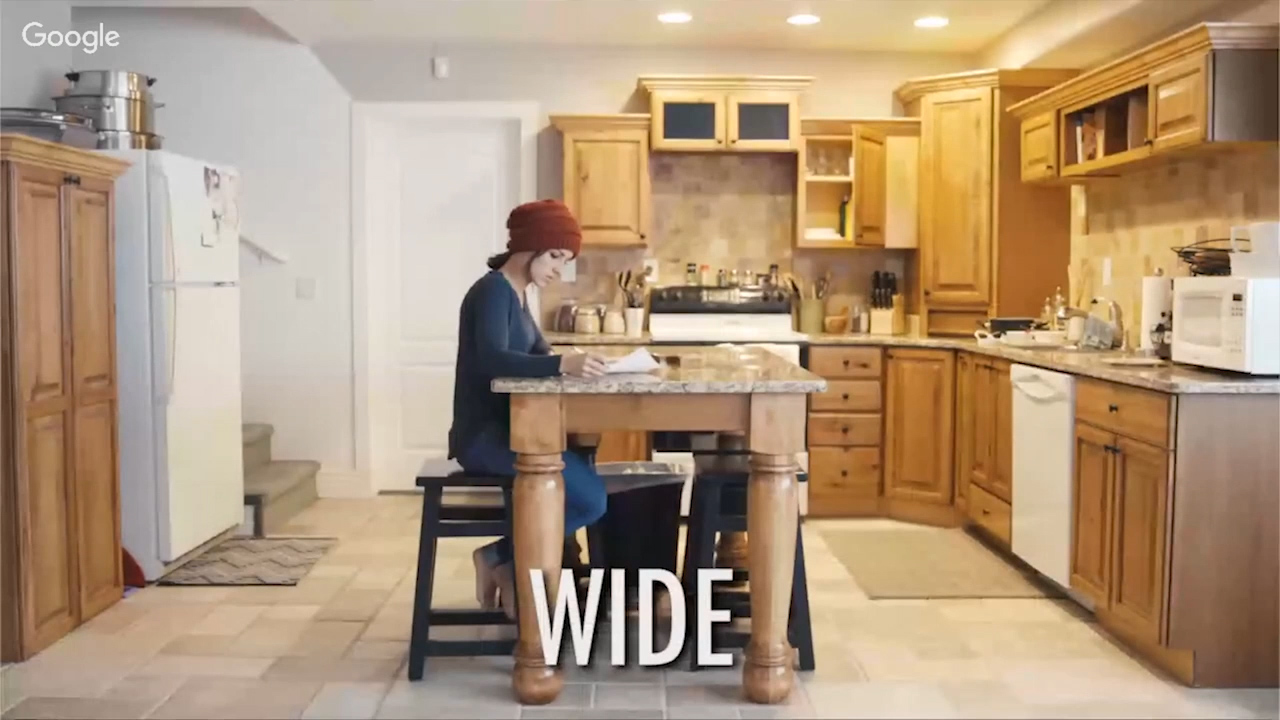
- The Long Full Body: Kind of like a wide shot but usually on a tighter focal length that covers from head to toe of your subject.
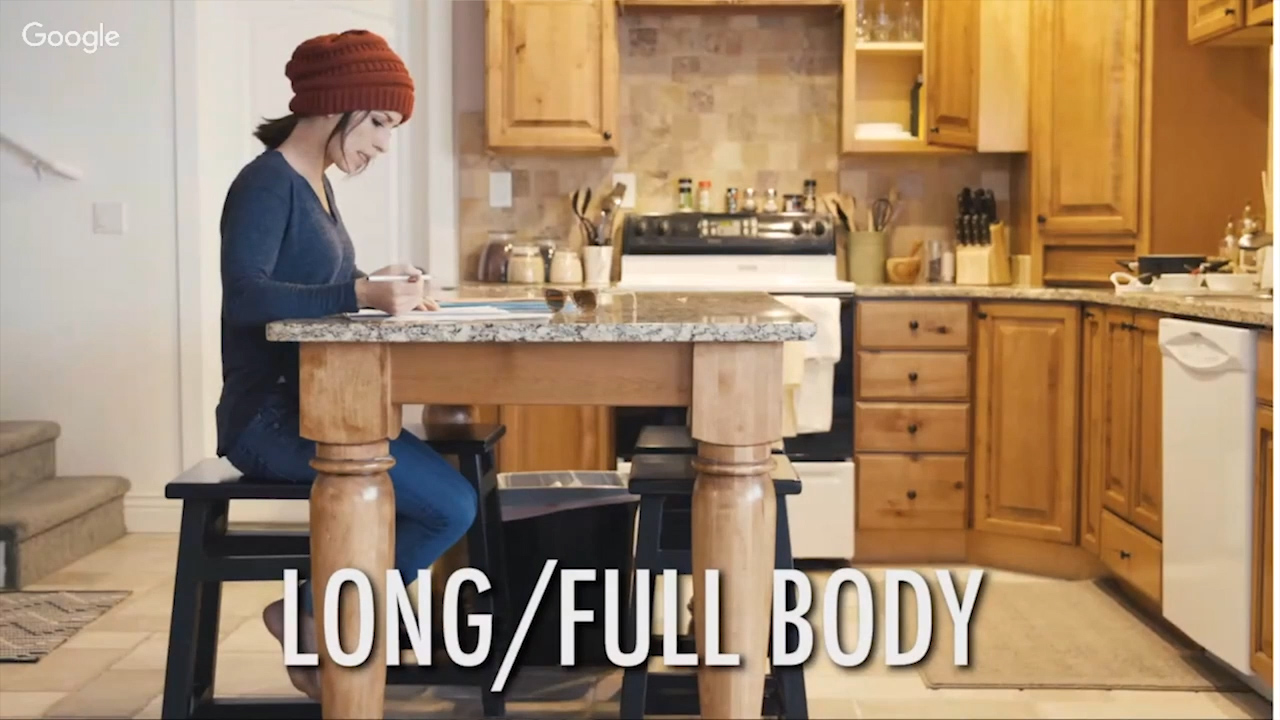
- The Medium Shot: Usually from the waist up.
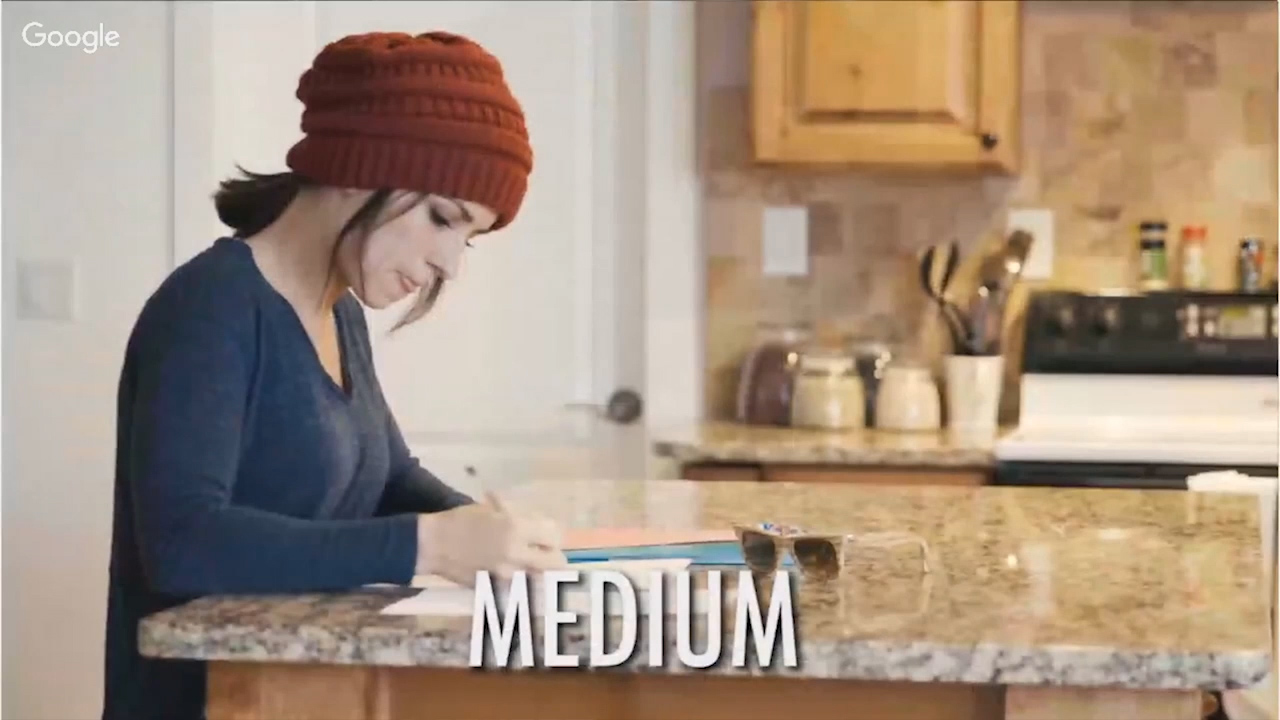
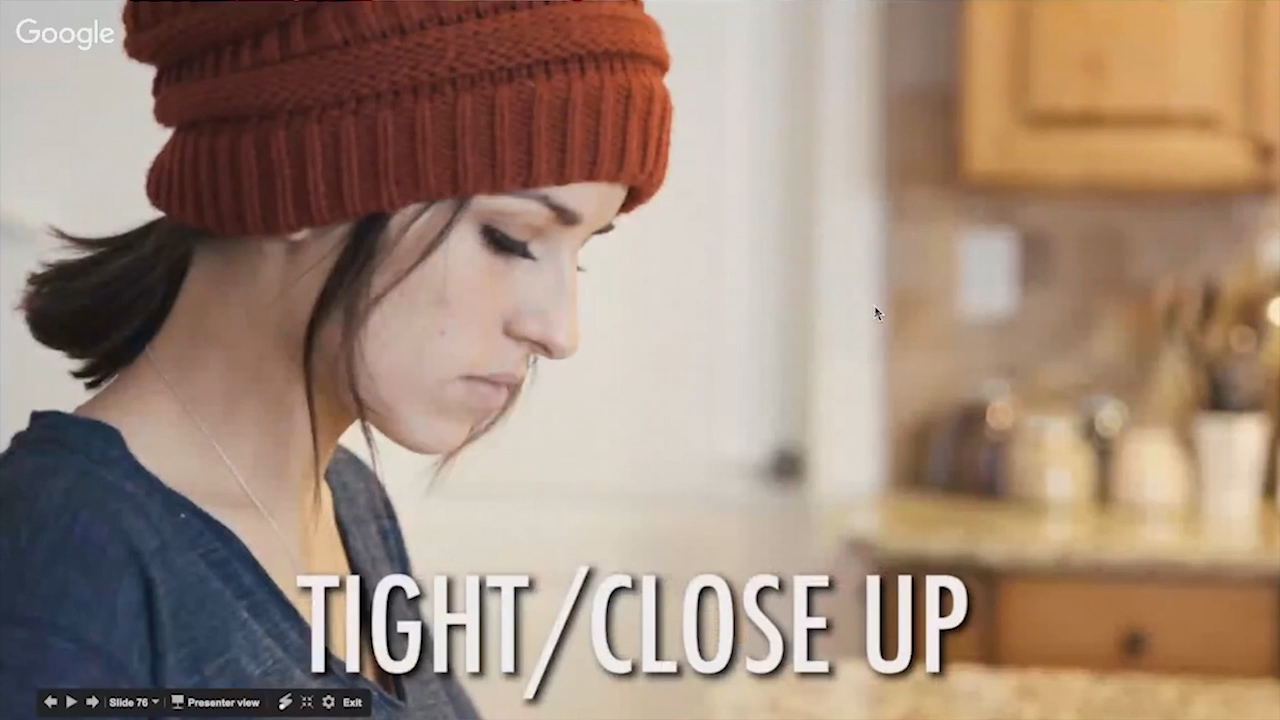
- The Tight or Close Up Shot: Usually just the face.
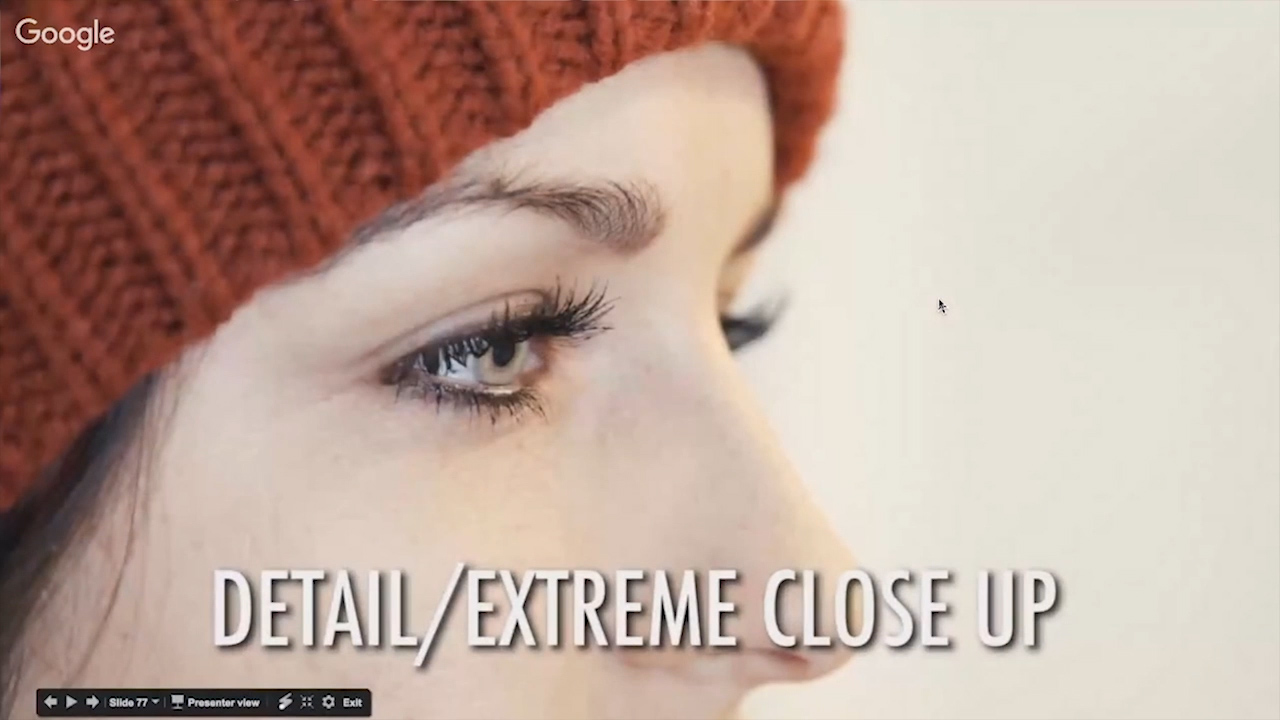
- The Detailed or Extreme Close-Up Shot: Focuses in on a specific detail.
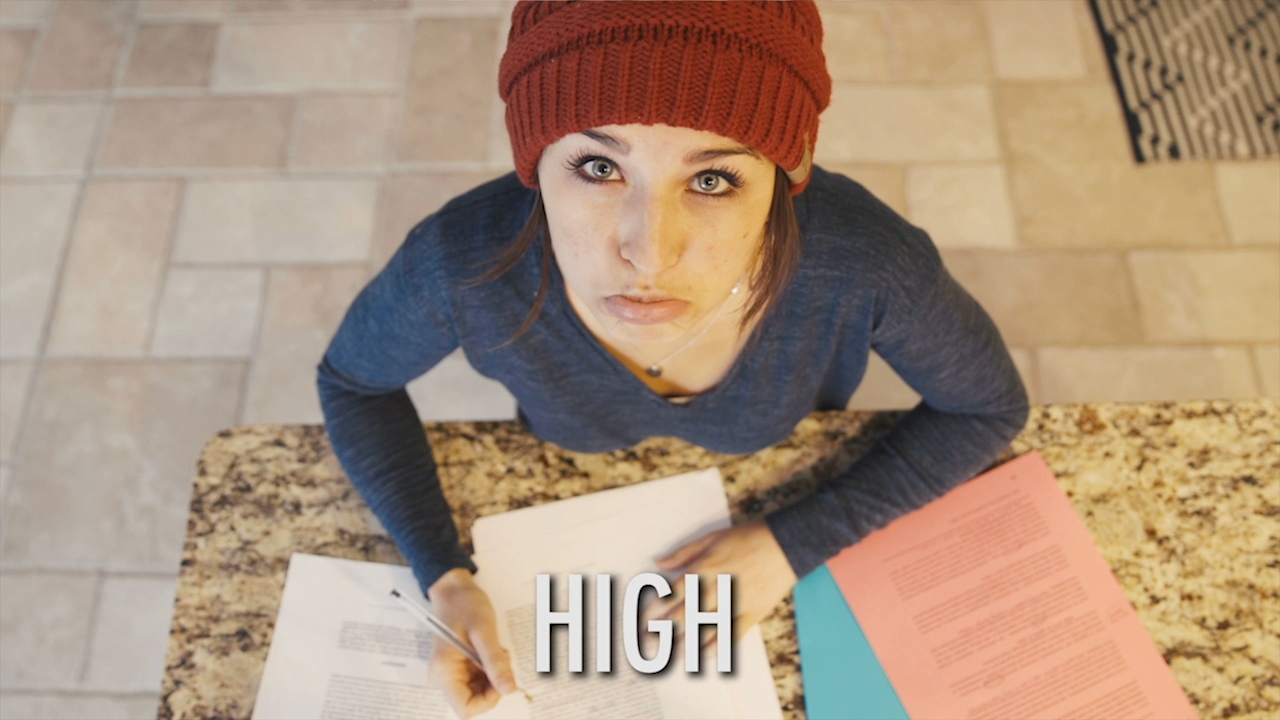
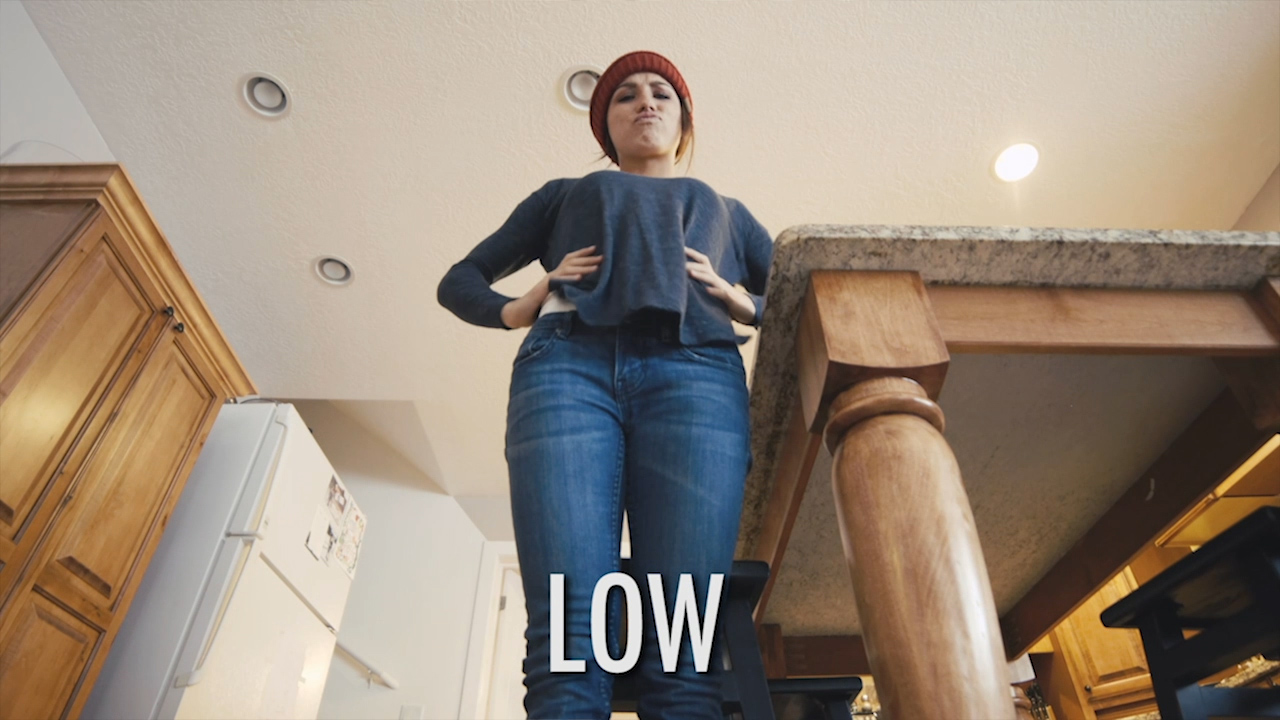
And then of course you can mix up those angles by doing low angles to show more power and dominance or high angles to show vulnerability and weakness etc.
And also I like to live by something called The 5 shot rule.
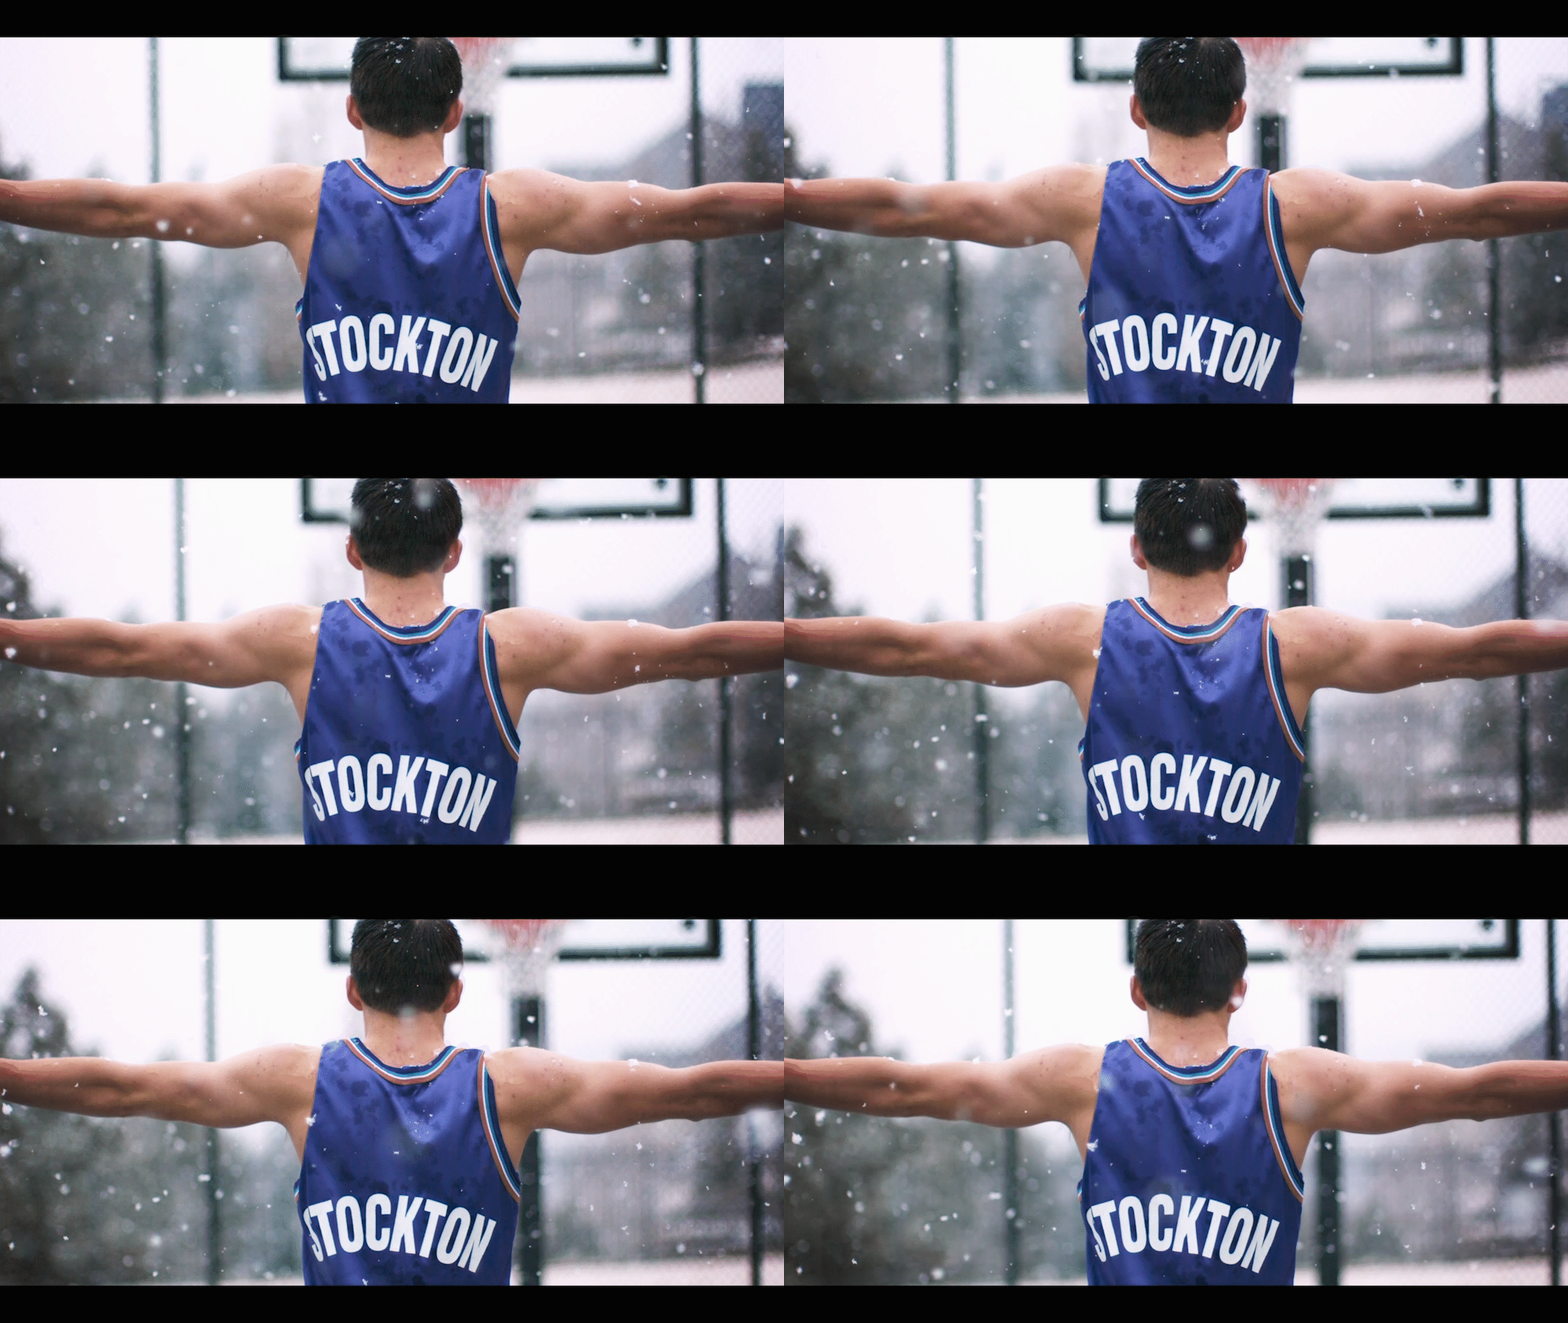
When I’m covering an important piece of action, I like to cover five different angles, to give me options while editing in post. To give you an example, here’s a scene that I shot from one boring angle, then shot the same scene but from 6 different angles and cut between them to show you how much more life it adds to your story when you use multiple camera angles:
And just FYI, I didn’t have multiple cameras, I just reshot the same the scene over and over again from a bunch of different angles and then worked my magic in the editing room to piece it together. You’ll notice that in the editing process, I also added sound FX, cinematic music, a voice over, slow motion, color grading, aspect ratio, etc. So there’s a lot of other things that went into making that more cinematic and I cover all those topics in the full program, but camera angles were a huge part.
CINEMATIC SECRET #7: Perspective or Lens Choice.
Which lens should you use and when?
This took me years to understand and I was honestly just guessing for a long time.
First and foremost, my favorite lens the wide angle lens. I like to use my Canon 16-35mm when shooting things like landscapes, real estate, or in-the-action sports because of the wide field-of-view.

But times that I don’t use 16mm is when I’m doing close ups on the human face.
As you can see it distorts all the facial features and isn’t very flattering.
It’s been said that between 70-100mm is the most flattering focal length for the human face. So when I am shooting something like a wedding or portraits I always pop on my standard lens, the 24-70mm. This allows me to zoom into 70mm when i’m shooting tight shots of faces, but I still have the flexibility to get pretty wide by zooming out to 24mm to get that wide group shot of the entire family. So the 24-70 is probably going to be your most versatile all purpose lens.
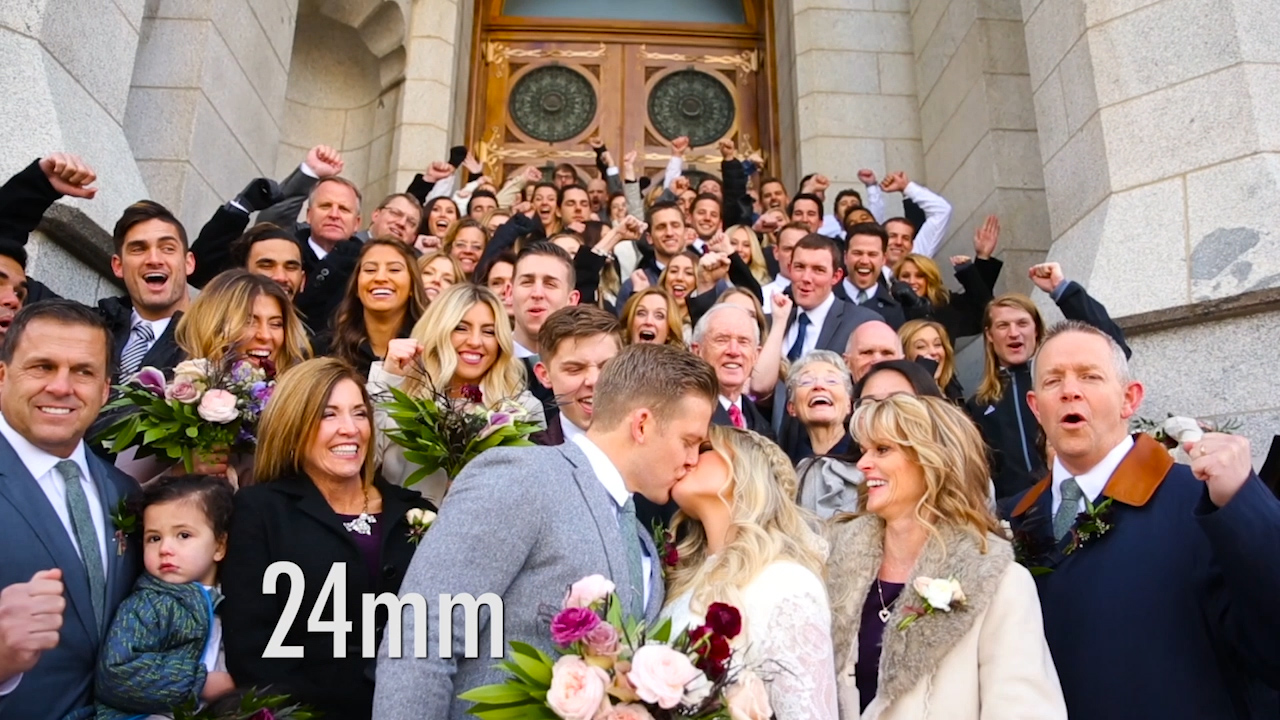
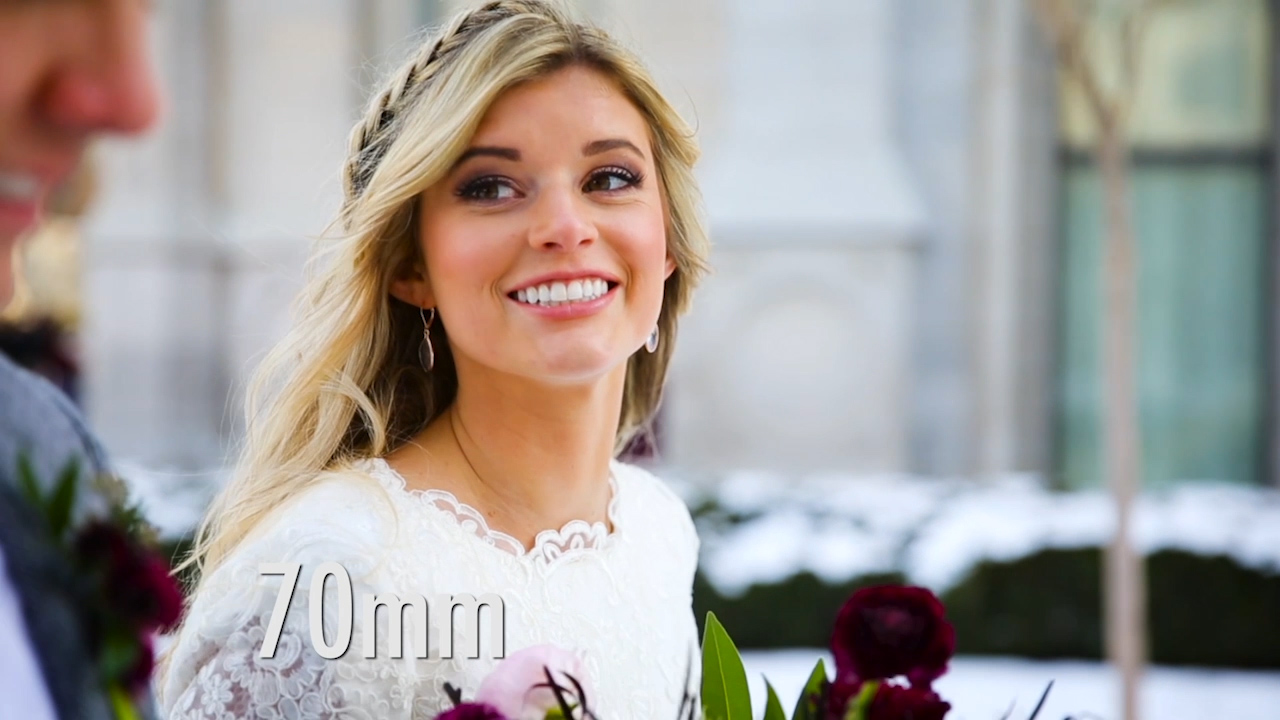
My next favorite lens is the telephoto lens (Canon 70-200mm) and I use this lens when I can’t physically get any closer to my subjects like when filming events.
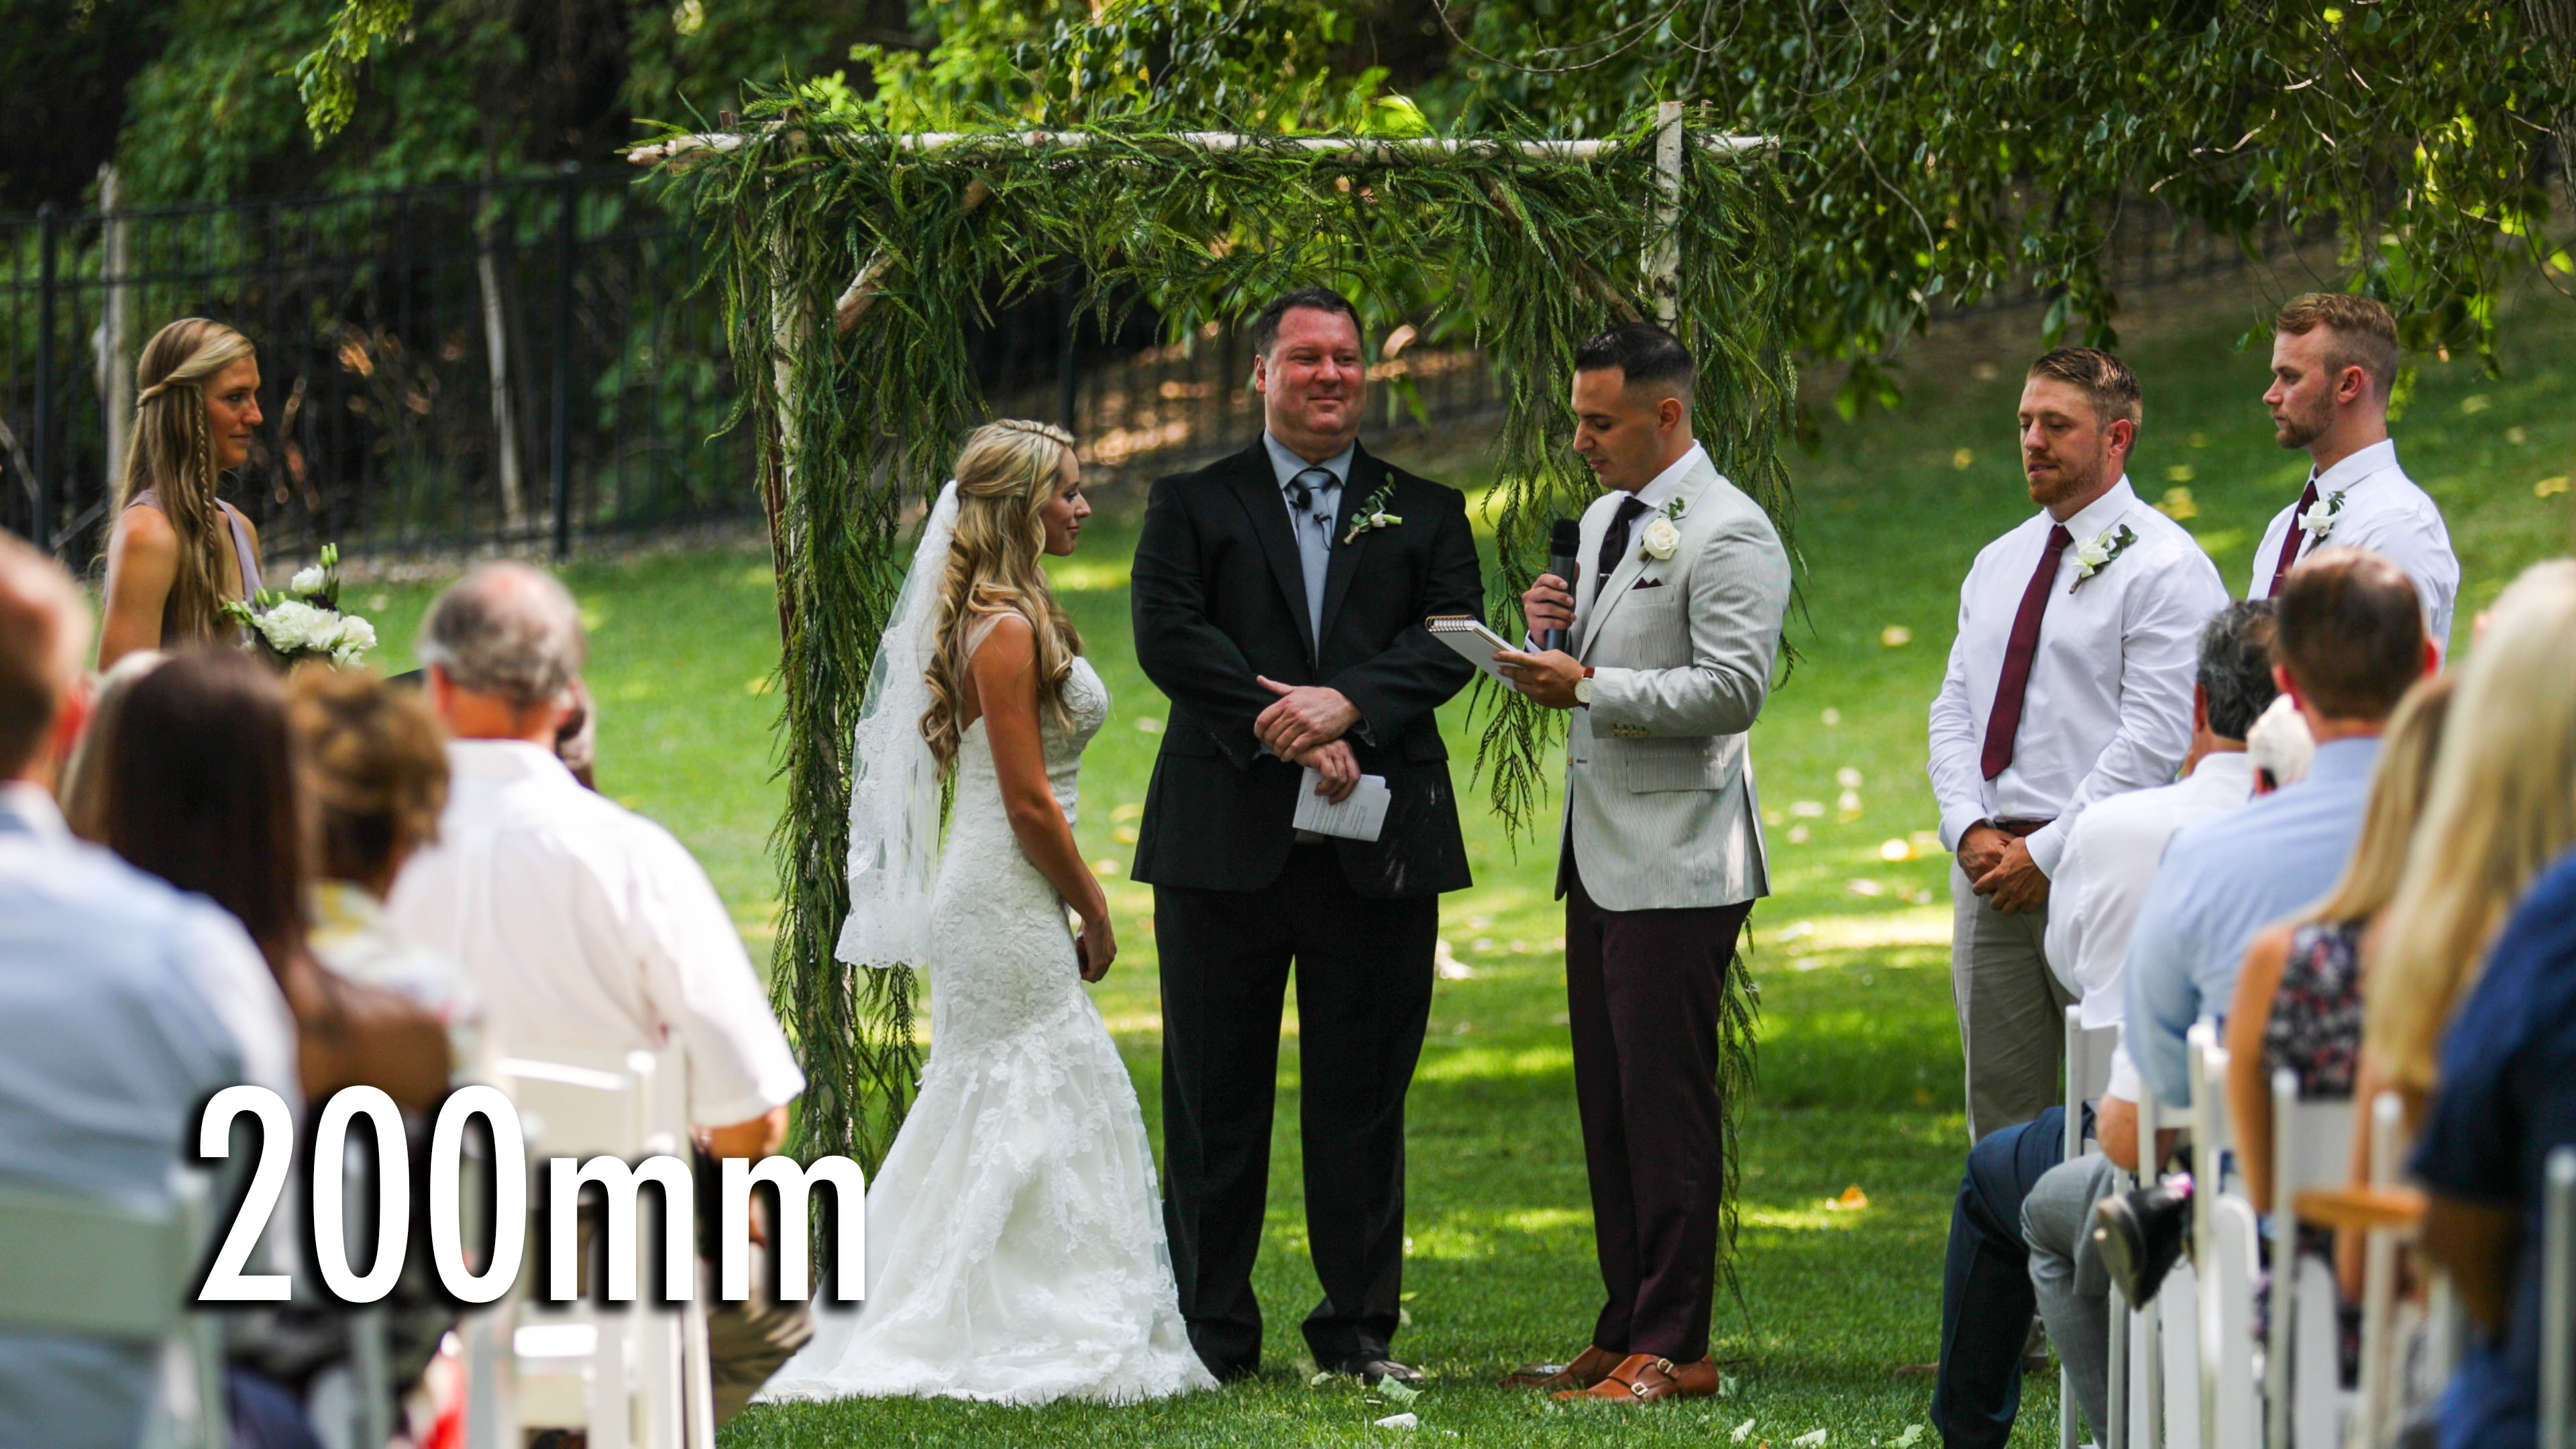
I also love using prime lenses (Sigma ART 20mm, 50mm, and 85mm) when I’m shooting low light situations, or when I have more setup time and can plan out individual shots.
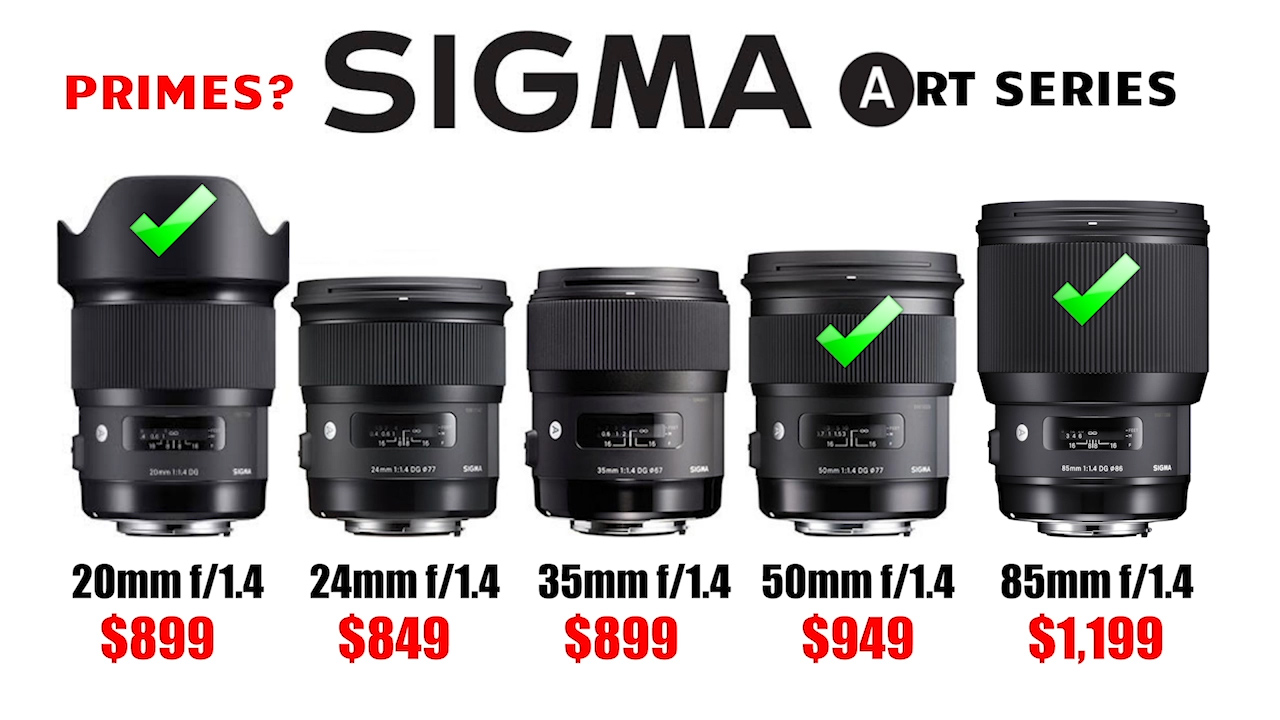
Prime lenses (fixed focal lengths) WILL give you a sharper cleaner image, BUT a lot of times, I need the versatility of my zoom lenses. But there you have my favorite lenses and the times that I use them.
CINEMATIC SECRET #8: STAY IN FOCUS
Everything could be perfect about your shot, but if it’s out of focus, it’s not usable. So one of the biggest questions I get is:
HOW TO DO I KEEP MY SUBJECTS IN FOCUS WHILE MOVING!?
I have part one of this tutorial on my youtube channel for free (part 2 is inside the course:
But here’s my 4 main tips for staying in focus while moving in summary:
1 – Get a camera with really good auto focus tracking like Canon’s dual pixel auto focus. I use my auto focus a lot, especially for things like interviews or any time I have predictable moving subjects.
2 – For manual focus, I’ll set my focus, then maintain the same distance from my subject throughout the whole shot.
3 – For a more handheld look, I will just hold the shaft of the glidecam and change focus as I move closer/farther from the subject, or if you use something like the Crane 2 or a DJI Ronin S, it has a focus wheel that allows you to rack focus manually as you move.
4 – Use a higher aperture, like between 16-22, so that everything is in focus.
CINEMATIC SECRET #9 is Polarizers
People always ask which filters I use and how I get so much dynamic range in my images. My answer is Polarizers. Check out this example of me rotating my polarizer on and off:
The polarizer cuts through the sun’s reflections and makes all of your colors look more vibrant. This also has the appearance of better dynamic range as it softens the highlights from sun reflection. So when shooting outdoors I always try to use my polarizer.
CINEMATIC SECRET #10: Lighting
I have another free video on my youtube channel covering a bunch of my tips for creating cinematic lighting patterns that you can watch here:
But one of the biggest questions I get is:
How do you effectively use ONLY natural light?
So I’m going to give you my three factors that I look for that affect natural lighting:
#1 Time of Day
The best time of day to shoot for those who don’t know is during golden hour. This is the first hour of light in the morning in the last hour of light at night.

When the sun is lower in the sky it creates the most flattering, colorful light. It allows you to use the sun as backlight, which is number 2:
#2 Camera Direction
Personally I LOVE shooting into the Sun. When you use the sun as your backlight, it gives you these beautiful sunflares coming in and out of your image which is a super popular cinematic look.
Using the sun as backlight also creates even light on your subjects faces, versus having your subjects faces being lit by direct sunlight. In the example below, the subjects on the left have squinty raccoon eyes because the sun is directly overhead and in front of them. On the right their eyes are wide open, there’s no squinting, no harsh shadows on face, just nice even light.
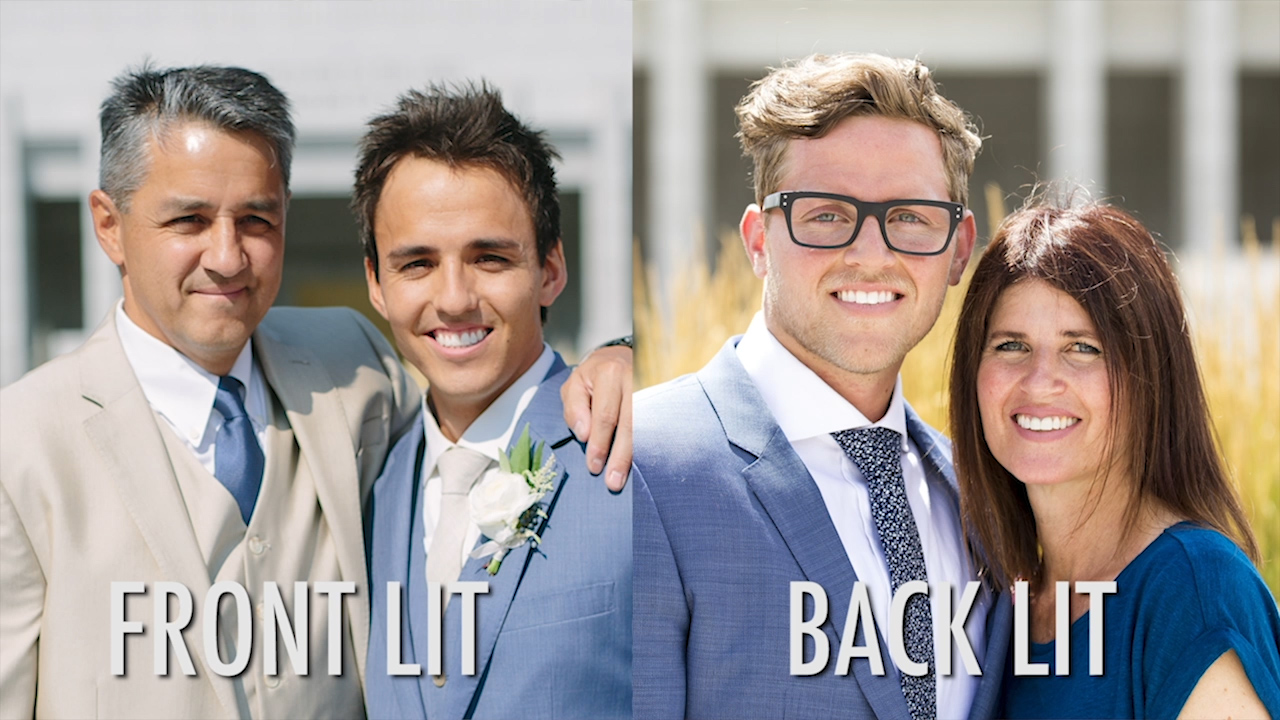
There are times when I like to use the sun as a front light source though. Here’s an example of shooting a landscape on a cloudy day, and then that same shot but with the scene being front lit by the sun. Look how much more color it adds to have the sun out.
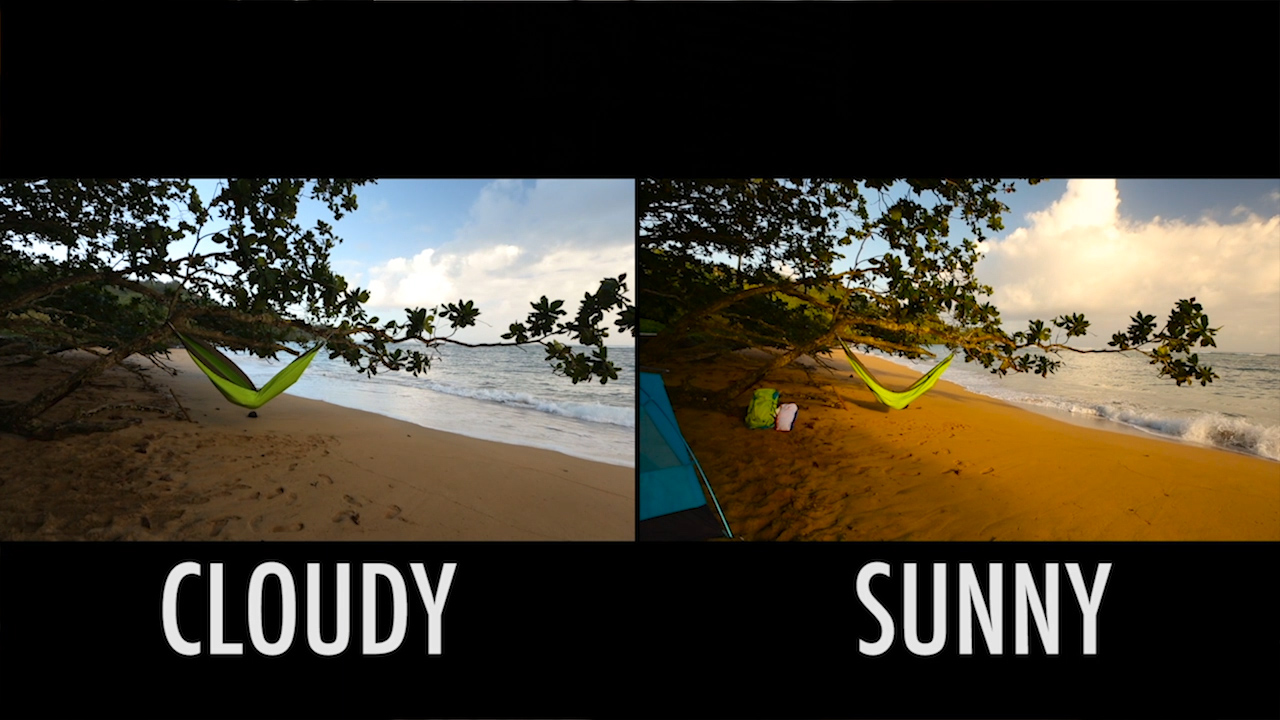
In this case, I had to wait around for a half hour for the weather to change to get the sun to pop, which brings me to the third factor that affects natural light:
#3 Weather
If you can, try and wait for the sun to come out, because it’s going to help your images “pop” more, but if the clouds do come out it’s not always a bad thing. There are certain things that actually look better with clouds. For instance, shooting people’s faces are great on cloudy days because the clouds acts as a giant diffuser which softens the light and creates a more flattering look on the faces. If it’s rainy or snowy, I love get epic slow motion shots because you have that rain or snow creating epic movement.
So there you have my three factors that affect natural lighting. Suffice it to say, lighting is a HUGE part of creating cinematic images and we cover it extensively throughout the course.
So there you have my 10 secrets to achieving cinematic shots, but wait… There’s MORE!
BONUS SECRET: Editing Tips
A lot of people don’t realize that HALF of the cinematic-ness of my videos happens in the editing room. I can take average footage and make it great, and great footage and make it amazing, because of my editing skills.
The editing software I use is Adobe Premiere Pro. I also teach from Final Cut Pro X, so it doesn’t matter which one you use, they are both great options and the course teaches both.
But I’m now going to give you a few editing tips…
Obviously I can’t even scratch the surface of everything there is to learn in just a few minutes, but I want to give you some of the big things to look for:
Editing Tip #1: Audio is equally important to Video
Do not neglect audio. I can’t harp on that enough. That’s one of the biggest telltale signs of an amateur film is if the audio sounds terrible. Make sure you get close enough to your subjects when recording audio, and also make sure you sound design! This means you are adding sounds on top of what you recorded, that will help make everything come to life, and I actually include some sound effects in the program to help my students start building a library of sound effects and give you a link where you can download a HUGE library of quality sound FX for free. For some awesome free tips on how to capturing great audio, check out my How to Shoot an Interview tutorial:
Editing Tip #2: Choose the Right Music
Here’s my four go-to music licensing websites:
And sometimes musicbed but they are pricey.
Also, I usually spend hours, sometimes even days, searching for the right piece of music. So be patient and find the right music that helps tell your story best.
Editing Tip #3: Color correction and color grading.
I won’t cover this in-depth here but within Premiere Pro I use an effect called Lumitri color.
Within lumetri color, I adjust the white balance using the temperature and tint.
Next I’ll adjust the exposure if needed, add contrast if needed, add saturation, and lastly I’ll go to my RGB curves and create an S curve, which means I bring my highlights up, and my shadows down, which creates contrast, and helps my image pop.
That’s my basic color correction process.
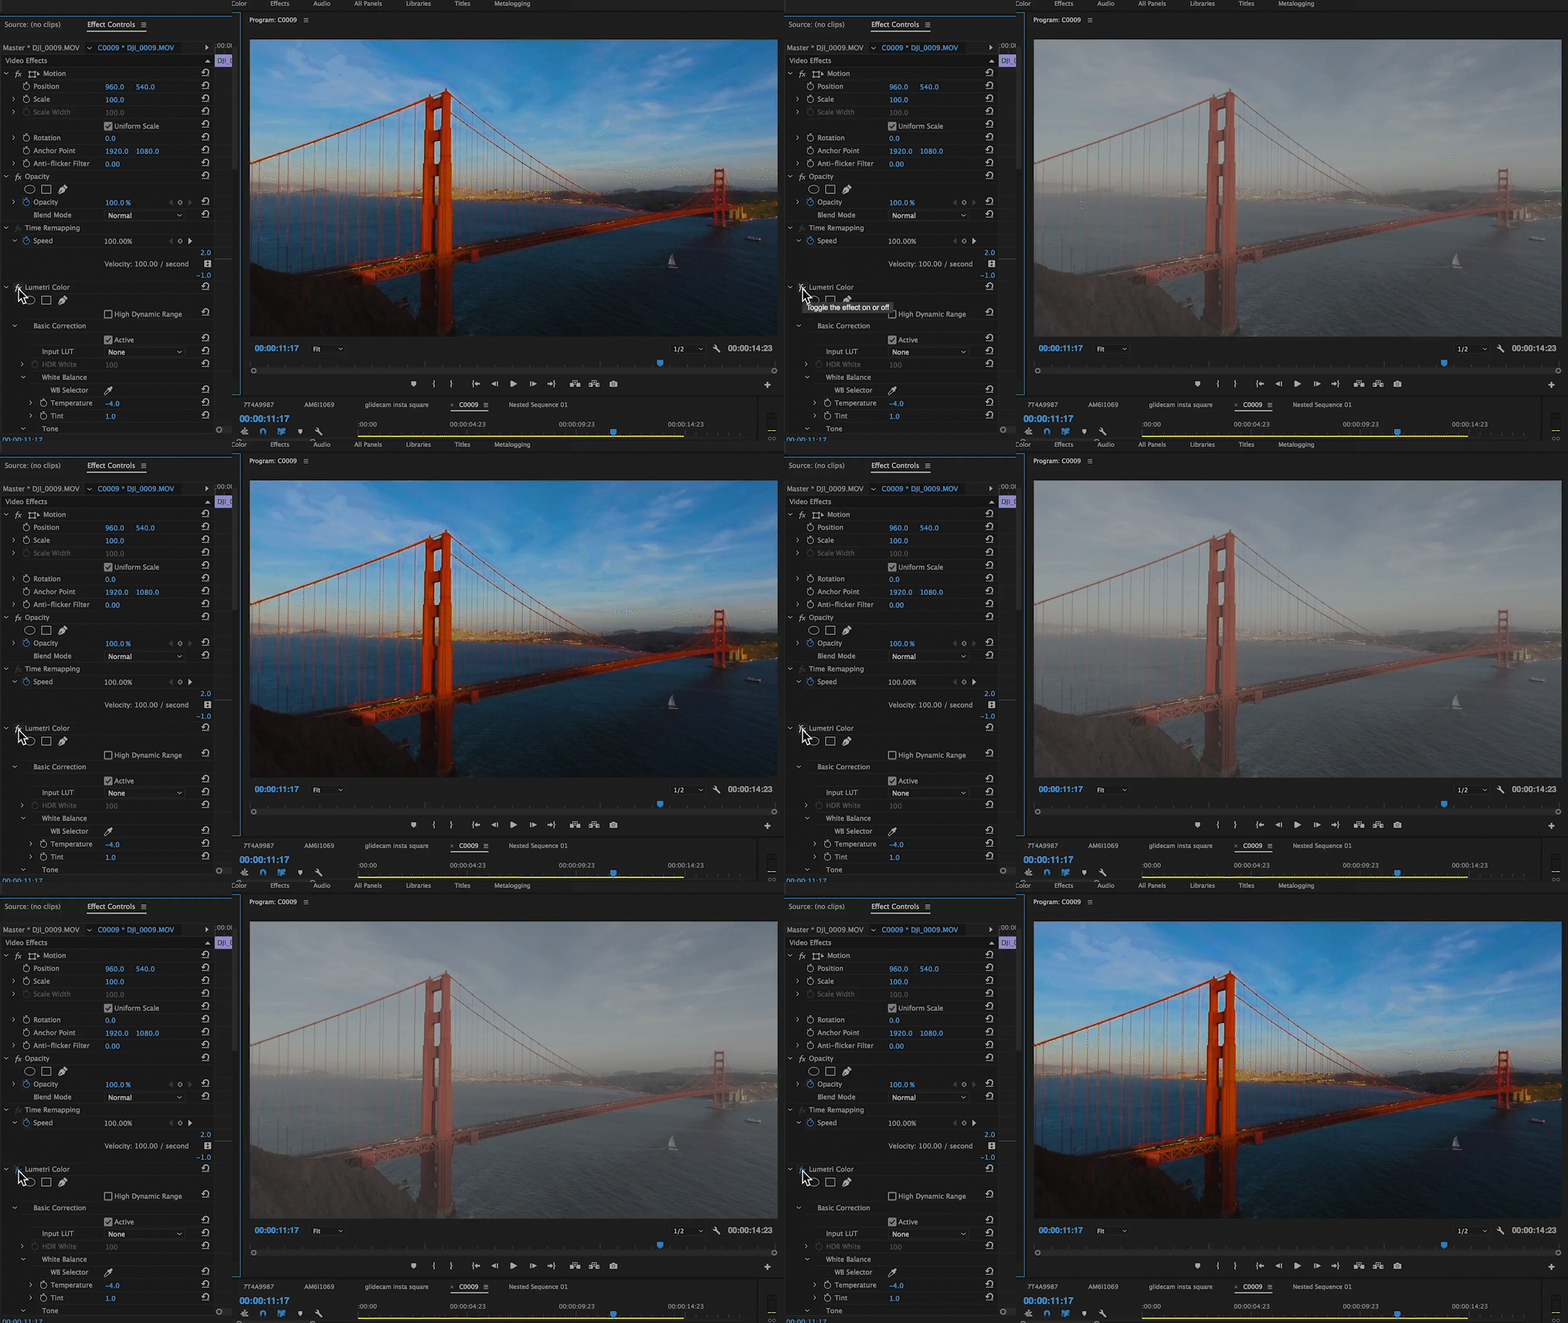
Color Grading on the other hand, is when you give your footage a specific look or feel.
Within the creative tab in lumetri color, you have the option to add LUTs or Look Up Tables, which are basically color grading presets, and you can then choose a look that fits your story.
One of the most popular color grades out there is the Orange and Teal Look or the Blockbuster look and you can see my explanation about why this look is so popular and how to achieve it by watching this video on my youtube channel:
I cover my full editing workflow from beginning to end in the full course, but hopefully that gives you a good starting point!
But there you have my My TOP 10 Secrets to Achieving Cinematic Shots!
Again I cover these topics more in-depth in the free 1-hour webinar, so make sure to save your spot at the next session if you haven’t already.
And if you’d like to join the full 20+ hour program, you can sign up at FullTimeFilmmaker.com.
Thousands have already joined the program from over 100 different countries, and many who have attended film school have claimed this course to be “More valuable than a semester at film school”.
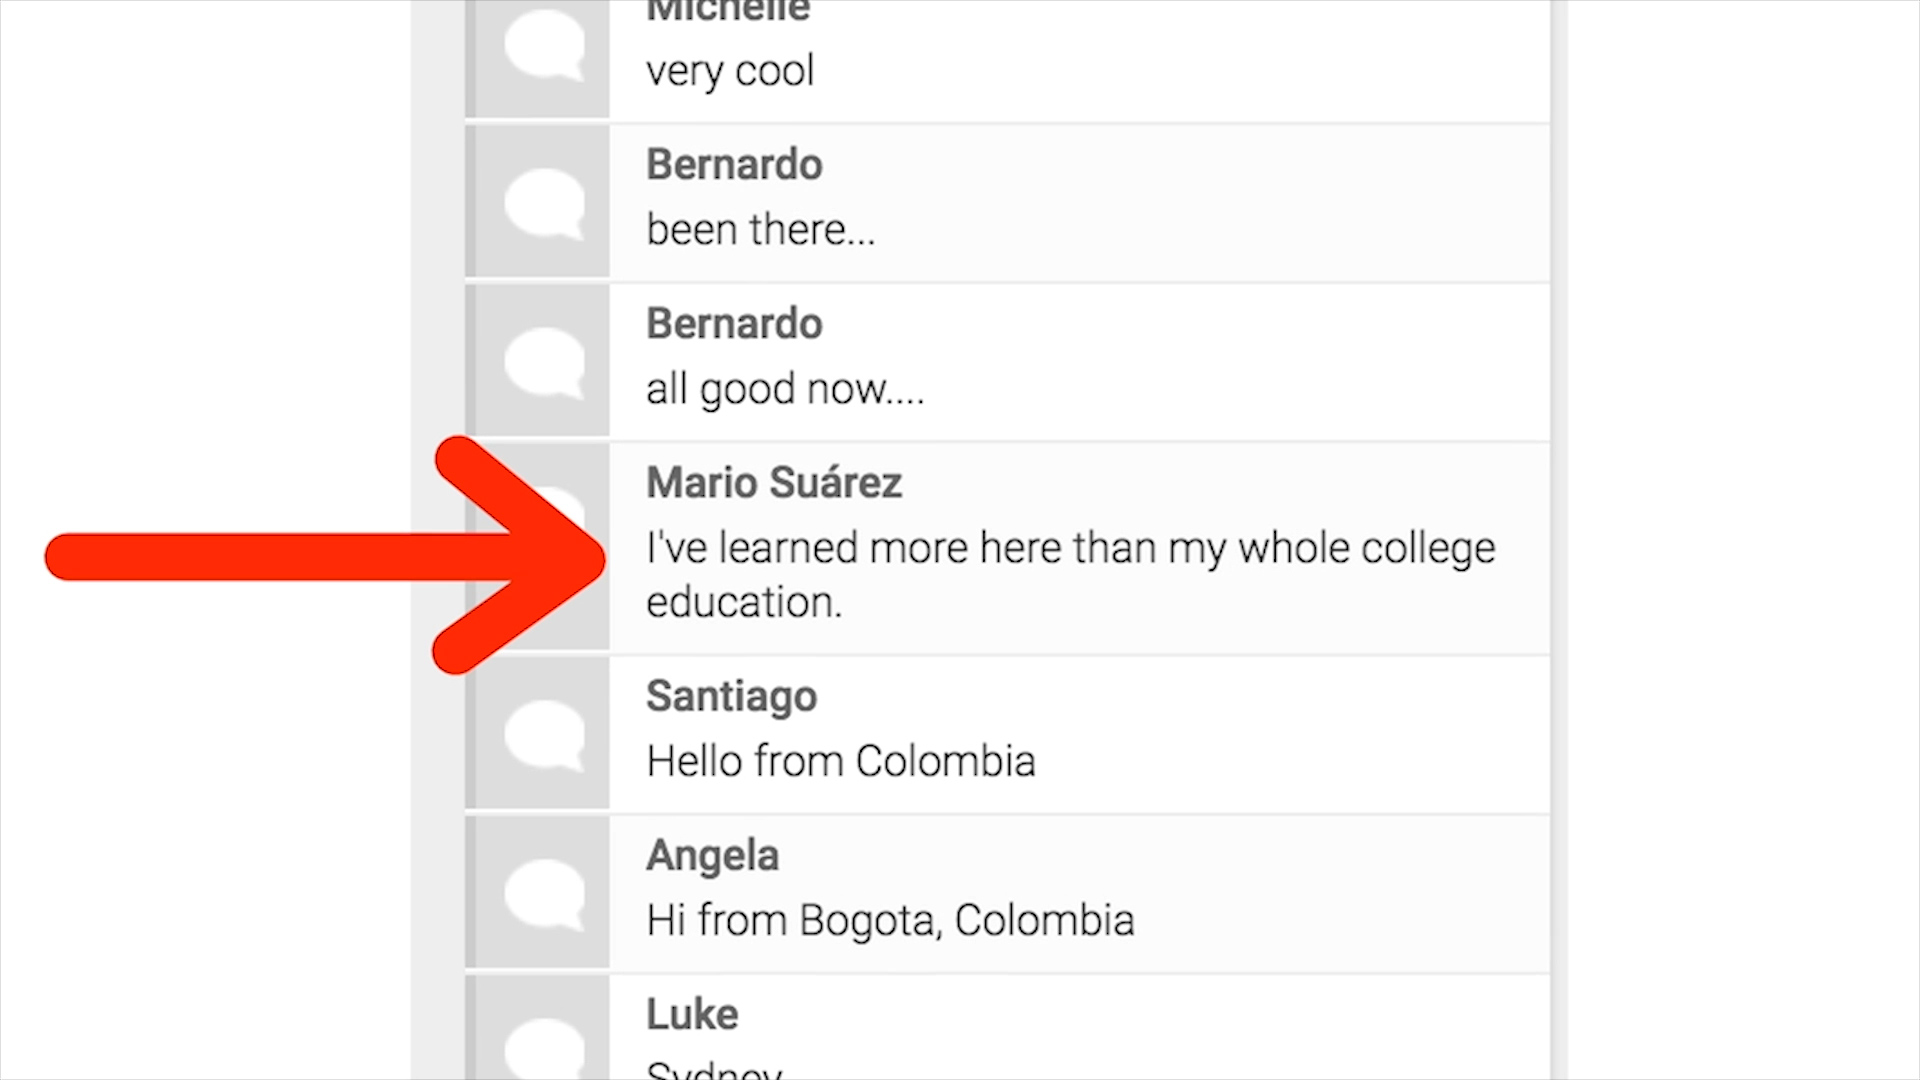
My goal with this program is to give you an option that is more affordable than film school, but way more valuable than free youtube videos (I know because I spent years sifting through youtube). AND to help you make more money than what you spend on gear/education!
Along with the value packed course, all full time filmmaker members get access to our private Facebook group to network with other filmmakers, access to regular video contests, feedback to their videos, and some awesome discounts:
60% OFF the Adobe CC Suite, saving you over $300 a year.
50% OFF Red Giant software,
10% OFF refurbished Glidecams, Zhiyun crane 2’s, Rhino Sliders, and Westcott lights.
20% OFF soundstripe memberships and 2 free months at Artlist for affordable unlimited music licensing.
And we also have some internal contacts to help you get discounts on G Technology Hard Drives and even some Apple Products.
Not to mention opportunities to come on set with me to job shadow in person and access to dozens of virtual job shadows like this one:
Any who, hope you got some good value out from this blog post. You can check out Part 2 covering my 6 steps to making money with video by clicking HERE
If you have any questions about joining, feel free to email me at [email protected].
